REVIEW · MONTREAL
Wooden Pen Making Workshop with a Woodworker in Montreal
Book on GetYourGuide →Operated by Jonathan Antebi · Bookable on GetYourGuide
A pen, made by hand, in Montreal.
This workshop is built around one satisfying goal: you’ll start with raw wood and finish with a pen you can use right away. I love the rare and local wood choices and how you can pair them with different metal plating finishes, so your pen looks personal, not generic. And the biggest day-to-day win is Jonathan’s teaching style in plain, calm steps, so the shop time feels doable even if you’ve never used a lathe.
There is one real consideration: you’ll want to dress for a bit of mess and workshop dust, because you’re sanding and working at tables with power tools.
The upside is that you’re not thrown into chaos. You’ll get safety guidance up front, then move through drilling, shaping, sanding, polishing, and final assembly in a way that makes sense.
The setting adds to it too. The workshop happens in Jonathan’s studio space, in a former historic mattress factory that’s been converted into art studios. You get that maker feel, without the intimidation—just a working shop, a patient instructor, and three hours that fly by.
In This Review
- Key things I’d plan around
- Entering the Montreal wood shop at Studio #148
- Choosing your wood and pen kit: where the pen becomes yours
- Drilling, gluing, and preparing the blank for the lathe
- Shaping on the lathe: precision you can feel
- Sanding, polishing, and the final assembly you’ll be proud of
- Snacks, pacing, and why 3 hours is the right length
- Price and what you actually get for $157 per person
- Who should book this workshop, and who should think twice
- Should you book it?
- FAQ
- How long is the wooden pen making workshop?
- What do I leave with at the end?
- How much does it cost?
- What’s included in the price?
- Do I choose the wood and the metal plating?
- What should I bring or wear?
- Is alcohol allowed during the workshop?
- Where do I meet the instructor?
- Is parking available?
- Is it wheelchair accessible and suitable for kids?
Key things I’d plan around
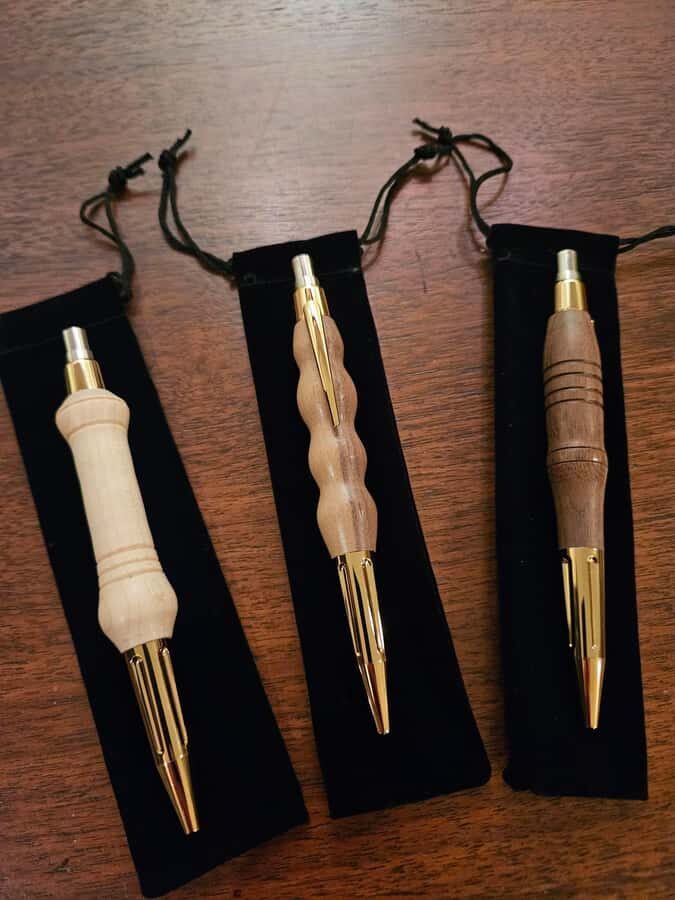
- You choose both the wood species and the metal plating, so your pen’s look is your call
- Hands-on lathe time under close guidance, not just watching from the sidelines
- Step-by-step drilling, gluing, shaping, sanding, and polishing, all included
- A quality check at the end, so you leave with something you can actually write with
- Snacks and drinks are part of the experience, which helps the pace feel easy
Entering the Montreal wood shop at Studio #148
You’ll meet at Studio #148 and ring at the front entrance to be let in. That matters because this kind of workshop is inside a studio building, not on a typical street-corner storefront. Once you’re in, the vibe is straightforward: tools out, materials ready, and a clear plan for what you’ll make.
Jonathan runs the session in French and English, which is great for visitors who want comfort without language stress. Even if your French is rusty, you’ll still be able to follow the process. The workshop also notes safety protocols at the start and provides safety equipment, so you’re not guessing what protection you should wear or when you should use it.
The space itself is part of the charm. This used-to-be mattress factory setting is now shared with art studios, which gives it a creative, working-studio atmosphere. It doesn’t feel like a museum demo. You’re learning a craft in an environment built for making things.
One detail I appreciate: the workshop is wheelchair accessible, which is not something you can take for granted with tool-heavy activities. That doesn’t guarantee every part of every machine is perfect for every mobility need, but it signals the space is set up with access in mind. If you use mobility aids, it’s smart to ask ahead about how movement works inside the shop.
A few more Montreal tours and experiences worth a look


Choosing your wood and pen kit: where the pen becomes yours
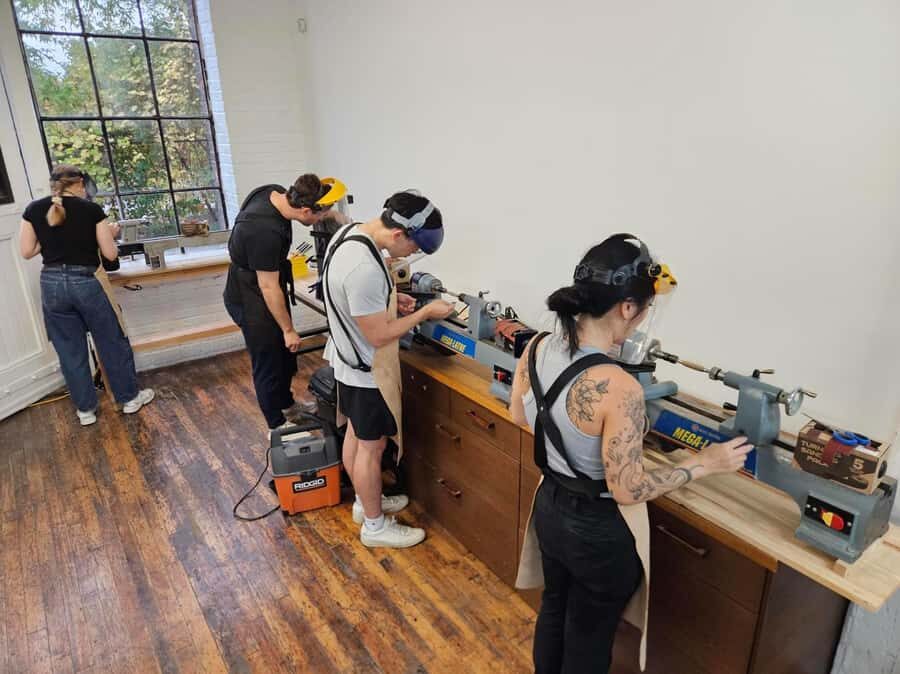
The session starts with an introduction to pen turning and the plan for the day. Then comes the part that really sets your pen apart: choosing your wood and your pen kit.
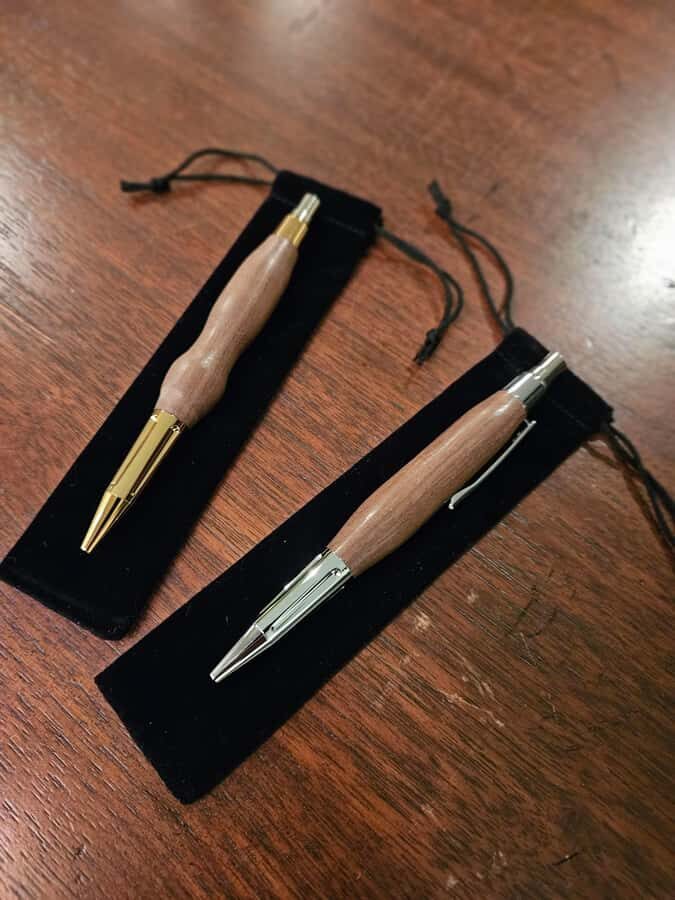
Jonathan offers an extensive range of exotic and local wood species, and the point isn’t just variety for fun. Each wood species brings its own grain pattern and character, which is what makes the finished pen look like an intentional handmade object rather than a generic craft souvenir. When you pick your wood, you’re picking the visual story—swirls, straight lines, dramatic contrast, or subtle texture.
Next you select your pen kit with your preferred metal plating. That’s a big deal for the final look. Metal plating changes how the pen catches light and how it contrasts with your chosen wood. So you can build a pen that feels warm and classic, sleek and modern, or somewhere in between.
I also like that you’re not just picking colors. You’re selecting materials that will determine how the turning, sanding, and finishing reveal the grain. Your choices affect how smooth the surface feels and how the pen shape comes out.
Drilling, gluing, and preparing the blank for the lathe
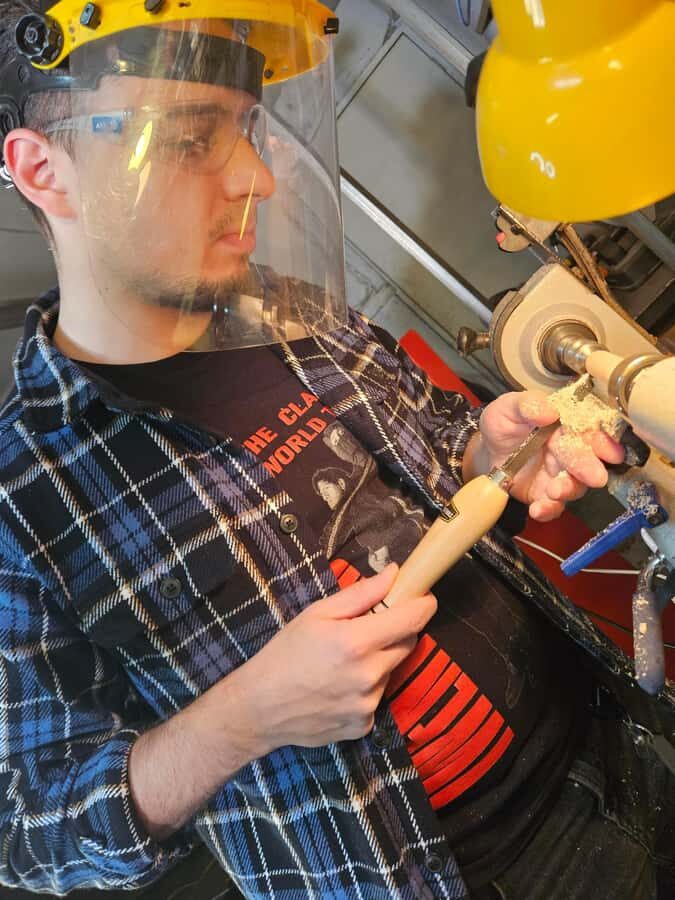
Once you’ve chosen your wood and plating, the workshop moves into the hands-on build stage.
You’ll be guided through drilling and gluing the brass tube into the wood blank. This is the step where careful setup really matters. If the tube placement is off, it can affect how the pen fits together later and how evenly the pen turns. The fact that you get close guidance here is key, because it teaches you the “why” behind the steps, not just the “do this now” instructions.
Then you head to the lathe.
You’ll learn what the lathe is and why woodworkers have used it for centuries. The history part isn’t just trivia. It helps you understand the tool’s purpose: controlled rotation so you can shape material with precision. That context makes the technique feel more grounded.
And yes, there’s a safety layer. The workshop includes safety gear, and you’ll go over protocols before machines come into play. If you’re worried about power tools, this is where you’ll feel reassured, because the day is structured to teach the steps in the right order.
One more practical point: you’re working in a shop environment with real tools, so slow, steady focus beats speed. If you go in with patience, you’ll get a much better outcome.
Shaping on the lathe: precision you can feel
This is the heart of the experience: turning and shaping your pen with the lathe while you’re under guidance.
What I like here is that the instruction is about control. Lathe turning isn’t about brute force. It’s about steady hands, correct technique, and watching how the wood responds as it rotates. You’re shaping with precision and care, then refining the form so the pen matches the kit and feels balanced in your hand.
If you’re the kind of person who enjoys seeing gradual progress, you’ll probably love this stage. The transformation happens in front of you: rough blank becomes a smooth, pen-shaped cylinder, then closer to the final profile.
The best part is how prepared you feel. In feedback from past participants, the standout theme is that Jonathan explains each step so well that using the equipment doesn’t feel like guesswork. That matters. When you understand what you’re doing, you can correct faster and enjoy the process more.
Also, because the workshop focuses on a single pen project, you won’t feel scattered. You’re practicing technique on one meaningful object, not hopping between unrelated demos.
Sanding, polishing, and the final assembly you’ll be proud of
After shaping, you’ll move into sanding and polishing. This stage is where your pen starts looking finished, not just functional.
Sanding is where surface quality becomes visible. You’ll work carefully through the steps needed to smooth out the shape and bring out the wood’s natural beauty. Polishing is the step that makes the final look pop—grain clarity, even sheen, and that satisfying feel when you run your fingers over the surface.
Then you assemble the pen and do a final quality check. This is the part I think many craft workshops skip, because they assume everyone leaves with an incomplete or slightly imperfect product. Here, the goal is to have you ready to take home and use or gift.
That’s also why the pen feels like a true keepsake. You’re not only learning technique; you’re finishing the object through the last checks. When you leave with a pen that works, it’s easier to value what you made.
And because you selected the wood and metal plating, the final result carries your choices all the way to the end.






Snacks, pacing, and why 3 hours is the right length
Three hours sounds simple, but it’s a smart duration for a project like this. It’s long enough for a full process—starting wood selection, preparation, turning, sanding/polishing, and assembly—without turning it into a whole-day commitment.
The workshop includes snacks and drinks, which helps more than you’d expect. Tool work and fine motor tasks use energy. Having breaks built in via refreshments keeps you focused and reduces that mid-session slump.
The pace also matters because pen turning has multiple stages where you want attention. If the day were rushed, sanding and polishing could turn into sloppy cleanup. With the structure you’re given, you can slow down where it counts.
At a practical level, plan to spend the entire session in active learning mode. You’ll want to listen, ask questions, and take your time. Past participants appreciated the guidance style and the clarity of explanations, which suggests you’re not meant to struggle alone.
Price and what you actually get for $157 per person
At $157 per person for about 3 hours, this workshop isn’t cheap in the way that a quick craft stop is cheap. But it also isn’t priced like a premium high-end private lesson with a custom bench. It lands in the middle, and the value comes from what’s included and what you leave holding.
You’re getting:
- Use of machinery and tooling
- Safety equipment
- Access to exotic and local woods
- Choice of metal plating for the pen kit
- Snacks and drinks
Most importantly, you leave with a completed handwritten object: a pen you helped make from start to finish. That’s the real “value math.” In other workshops, you might make a part, or something that needs finishing later. Here, the structure is aimed at taking you through to the end, with a quality check before you go.
If you want a souvenir, you could buy one. If you want a skill experience that results in a usable craft piece, this price can feel fair.
Who should book this workshop, and who should think twice
This is a strong fit for:
- People who like hands-on learning and want to see the full process
- Visitors and residents in Montreal who want something more personal than a standard sightseeing stop
- Anyone who enjoys wood grain aesthetics and wants a pen that reflects their material choices
- People who want clear instruction and reassurance in the shop, which matches the feedback about Jonathan’s patience and teaching
It may not be the best fit if:
- You’re uncomfortable getting your clothes dirty or spending time around wood dust and shop mess (the workshop expects that you come prepared)
- You’re traveling with kids under 12; the workshop notes it’s not suitable for children under 12
- You’re hoping for a party atmosphere with alcohol; alcohol and drugs are not allowed
Also note the basics for participation: wear clothes that can get dirty and closed-toe shoes. Bare feet are not allowed. These rules aren’t there to be annoying—they’re about safety in a working shop.
Should you book it?
If you want a workshop where the finish product is actually finished, I think booking makes sense. The session is designed around real craft steps—from drilling and gluing to lathe turning, then sanding/polishing and final assembly—so you leave with a pen that feels earned.
I’d book it especially if you like clear, patient teaching. The strongest praise tied to this experience is how Jonathan explains each stage so you understand what you’re doing while you’re doing it. That’s the kind of guidance that turns a “I hope I can do it” day into a “I made this” win.
If you’re squeamish about getting a bit messy, or you want zero tool time and only watching, you might be better with a different kind of workshop. But if you show up ready to learn and follow safety guidance, this is the kind of small-group craft day that actually sticks with you.
FAQ
How long is the wooden pen making workshop?
The workshop lasts 3 hours.
What do I leave with at the end?
You’ll leave with a handcrafted pen made by you, ready to use or gift after assembly and a final quality check.
How much does it cost?
The price is $157 per person.
What’s included in the price?
It includes the use of all required machinery and tooling, safety equipment, wood selection, metal plating choices, snacks, and drinks.
Do I choose the wood and the metal plating?
Yes. You’ll choose from a range of exotic and local woods, and you’ll also select the metal plating for the metal pen kit.
What should I bring or wear?
Wear clothes that can get dirty and closed-toe shoes. Bare feet are not allowed.
Is alcohol allowed during the workshop?
No. Alcohol and drugs are not allowed.
Where do I meet the instructor?
Meet at Studio #148. Ring at the front entrance and you’ll be let in.
Is parking available?
Parking is allowed in the parking lot for free after 3pm. For bookings before 3pm, street parking is available.
Is it wheelchair accessible and suitable for kids?
The workshop is wheelchair accessible. It’s not suitable for children under 12.