REVIEW · VANCOUVER
Stanley Park Self Guided Bike Tour
Book on GetYourGuide →Operated by Moves Media · Bookable on GetYourGuide
Stanley Park is better from two wheels. This self-guided GPS audio bike tour lets you ride the park’s 9km loop at an easy pace while your phone delivers landmark-by-landmark commentary right when you’re there. I especially like how the route hits the big icons (the Stanley Park Sea Wall and Totem Poles) without forcing you into a rigid group schedule, and I also like that the app includes multiple languages. One thing to consider: your phone has to stay usable enough for the GPS audio to trigger correctly, so plan to keep it unlocked during the ride.
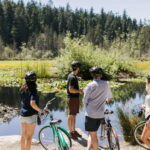
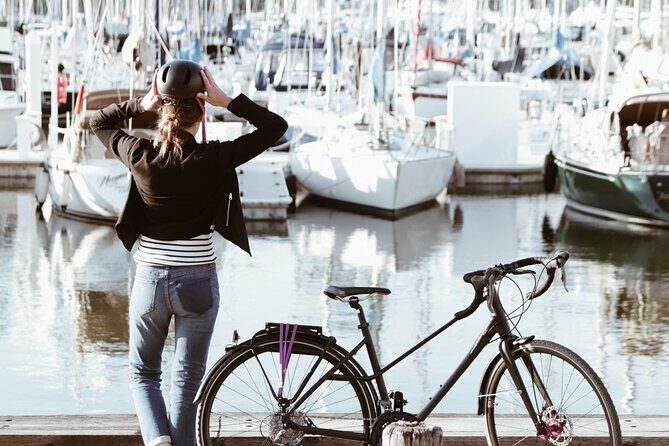
You’ll start at Spokes Bike Rental on West Georgia Street, then pedal through prime Vancouver scenery: the Sea Wall, Brockton Point, the Lions Gate Bridge views, and beach time along the way (Third Beach is a highlight). At about 2 hours with an easy difficulty level (just a few small hills), it’s a great way to see a lot of Stanley Park without turning the day into an all-day workout.
In This Review
- Key things I’d plan around
- Getting started at Spokes Bike Rental on West Georgia
- The route: a simple 9km loop that hits the park’s best views
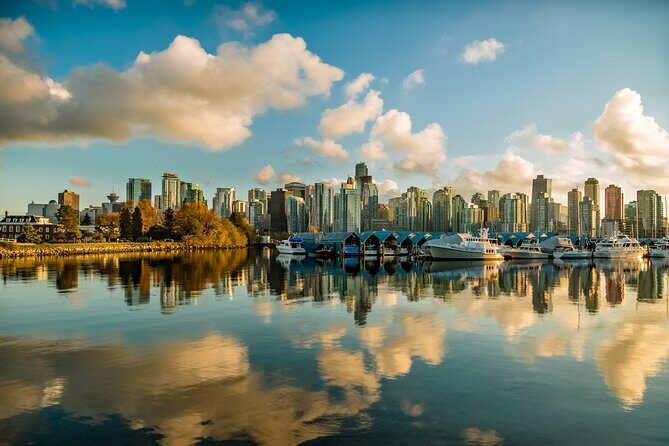
- Sea Wall riding: the Vancouver skyline on your left and right
- Totem Poles and Brockton Point: where the stories feel anchored
- Lions Gate Bridge views: short, dramatic payoff
- Vancouver Aquarium and the beach stops: mix family-friendly fun with fresh air
- App experience: what the GPS audio does well (and what can trip it up)
- What you’re really paying for: $6 audio, plus your bike rental choice
- Packing checklist for a better two hours
- Who this Stanley Park self-guided bike tour is best for
- Should you book this Stanley Park GPS audio bike tour?
Key things I’d plan around
- GPS-triggered audio that guides you through the loop in real time, not just a map.
- Icon stops built into one ride: Sea Wall, Totem Poles, Lions Gate Bridge views, and Third Beach.
- Phone setup matters: headphones aren’t included, and keeping your phone accessible helps the audio track smoothly.
- Bike rental is separate at Spokes, so your total cost depends on what you choose.
- Multi-language options help if you’re riding with others who prefer English or Spanish.
Getting started at Spokes Bike Rental on West Georgia

This tour’s meeting point is Spokes Bike Rental, 1798 W Georgia St, Vancouver. Practically, that’s a win because you’re not hunting for a mysterious pickup spot; you walk in, rent your bike, then focus on riding and listening.
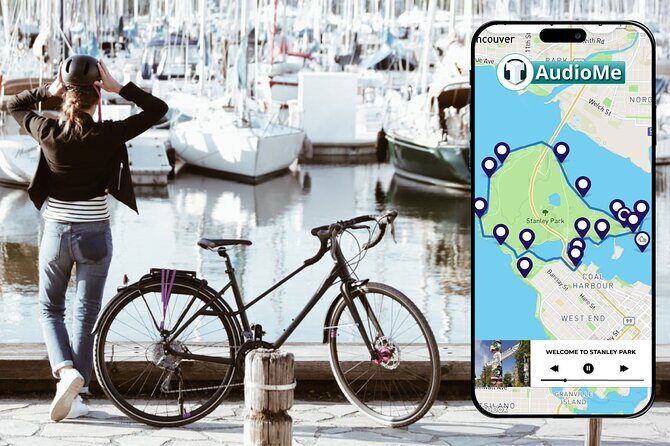
The tour itself is GPS-based audio, delivered through the AudioMe Tours app. Your ticket covers access to the tour audio and the GPS map showing your location and route. What it does not include is a bike (that’s on you at Spokes) and headphones (you’ll need wireless earbuds or a speaker solution for clear listening).
If you want the ride to feel smooth, do a quick phone check before you roll out:
- Charge enough battery for two hours plus extra buffer.
- Pick your listening setup (earbuds tend to be easiest on bikes; a small speaker can work if sound levels are comfortable for those nearby).
- Download and start the app before you leave the shop.
You can also read our reviews of more cycling tours in Vancouver
The route: a simple 9km loop that hits the park’s best views

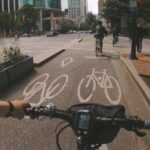
Stanley Park’s biggest advantage is that you get variety in a single loop: ocean views, forest scenery, viewpoints, and beach areas. This self-guided ride is designed around that logic with an easy, 9km loop that takes about 2 hours.
The ride difficulty is listed as easy, with only a few small hills. That matters because it tells you what to expect: you’re not signing up for a grinding climb, you’re signing up for steady cruising and frequent stopping.
Why the loop format is so useful:
- You don’t have to make a complicated route decision.
- You can spend your energy on enjoying the scenery rather than navigating the park.
- The GPS audio is meant to keep you moving from one highlight to the next.
Still, self-guided tours are only as relaxing as your pacing. If you’re the type who stops every time you see a photo angle (and I mean that as a compliment), you’ll likely spend a little longer than the pure ride time. That’s not a problem—just plan for it.
Sea Wall riding: the Vancouver skyline on your left and right
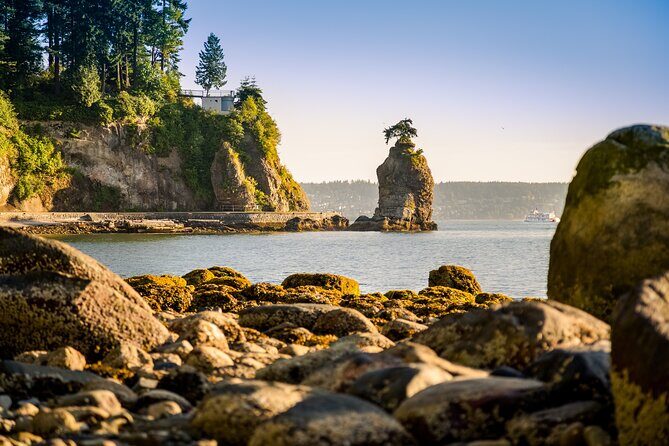
The Stanley Park Sea Wall is one of the main reasons people do this park by bike, and it’s also a named highlight of this tour. You’ll ride along the water-facing route with big, open views back toward downtown Vancouver.
I like Sea Wall time because it’s both scenic and functional. It gives you:
- Long sightlines (great for photos and for simply soaking in the skyline).
- A smooth, straightforward stretch of riding compared to more stop-and-go internal park paths.
- A natural place where audio commentary can sync well with the scenery as you pass key areas.
If you plan to pause for photos, do it deliberately. Pull off when you can and give yourself a couple of minutes to enjoy the view without feeling rushed. The audio tour is designed to guide you at your pace, but you’ll get the best experience when you let the commentary and the landscape land together.
Totem Poles and Brockton Point: where the stories feel anchored
After the Sea Wall section, you’ll hit the Totem Poles area and Brockton Point. These stops matter because they turn Stanley Park from scenery into context.
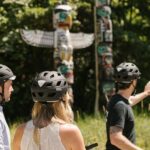
The Totem Poles are a major landmark for a reason: they give you something to look at while the audio brings in history and local knowledge. Brockton Point is a helpful pairing because it’s still about views and park energy, but it also gives your ride a sense of place—like you’re moving through distinct “zones,” not just passing time on the perimeter.
One tip for these cultural stops: treat them as a short break, not a quick roadside glance. Even if you only spend 5–10 minutes, it changes the feel of the ride. You’re not just doing landmarks; you’re getting meaning.
Lions Gate Bridge views: short, dramatic payoff

The Lions Gate Bridge shows up as one of the tour highlights. On a bike loop like this, bridge views are especially satisfying because you get the sense of the city pulling into the park world.
What to watch for:
- The direction of sightlines as you ride. Views tend to open up more as you approach certain stretches.
- Photo timing. You’ll get chances to capture the bridge with water and the park in the same frame, which is exactly the kind of contrast that makes Vancouver photos work.
This isn’t a stop where you need to sprint or over-plan. It’s more like a moment the route hands you—so keep your pace steady and let the audio guide you into where the viewpoint best lines up.
You can also read our reviews of more guided tours in Vancouver
Vancouver Aquarium and the beach stops: mix family-friendly fun with fresh air
The tour highlights include Vancouver Aquarium, and the beach areas are a big part of the experience too, especially Third Beach (with Second Beach also part of the route).
Here’s why this mix is smart for a two-hour ride:
- The Aquarium gives you a recognizable anchor point in the park’s visitor zone.
- The beaches let you change your brain from “landmark scanning” to “relax and reset.”
If you want to make the beach portion actually worth it, the packing tips are your clue. Bring a bathing suit if you’re even half-interested in a quick dip. I also like having a small snack because it turns beach time into a real break rather than a rushed stop.
Also, don’t underestimate the simplest beach plan: sit, breathe, and let your shoulders drop for a few minutes. Two hours on a bike can feel longer than you expect once you’re concentrating on pedaling and audio prompts—so give yourself permission to slow down.
App experience: what the GPS audio does well (and what can trip it up)

The core of this tour is the app experience: you get a GPS map that shows your position and route, plus GPS-based audio commentary timed to what you’re passing.
The most praised part of the experience is how well the audio triggers. One of the strongest pieces of feedback points to GPS-triggered commentary that starts at the right moments, with narration that’s engaging and full of history, stories, and wildlife facts. Another clear win is the multi-language support, including English and Spanish, which is ideal for mixed-language groups.
Now for the practical caution. One review noted that the GPS audio did not follow progress unless the phone was unlocked. That doesn’t mean it fails every time, but it does mean you should avoid the low-power/lock-screen trap. My advice:
- Keep the phone accessible during the ride.
- If your screen locks automatically, adjust settings before you start.
- Plan to listen through a stable connection setup so the audio keeps flowing.
If you handle that, the tour experience tends to feel smooth and “hands-free” in the best way—no constant checking for directions.
What you’re really paying for: $6 audio, plus your bike rental choice
At $6 per person, the price is mostly about the audio + GPS tour access. Your total trip cost will depend on your bike rental from Spokes.
That’s the main value equation to understand:
- The tour delivers paid content and guidance, not a full bike-and-guide package.
- You control your bike choice at Spokes, which can be good if you already know what you want (comfortable bike vs. something lighter, number of speeds, etc.).
One review mentioned bike rental prices can run high (up to about 40 CAD), and also emphasized that the bike shop is separate from the tour. That’s useful to know because it helps you budget realistically instead of assuming your bike is included.
So if you’re trying to decide whether the $6 is worth it: it usually is if you want commentary while riding and you’re comfortable handling your own bike logistics. If you want a human guide or a fully packaged rental deal, you might compare against other guided options.
Packing checklist for a better two hours

The tour strongly hints at what makes your ride more enjoyable. Use it.
Bring:
- Phone charged (seriously, charge it).
- Wireless earbuds or a speaker so the audio is clear.
- Water bottle.
- Sunscreen.
- Snack or lunch (or buy something along the route).
- Hat and sun glasses.
- Camera.
- Bathing suit if you want to actually use beach time.
I also suggest bringing a small towel or at least something to keep sand under control if you do go for a dip. That’s not required info from the tour details, but it’s the kind of small comfort that makes beach plans feel effortless.
Who this Stanley Park self-guided bike tour is best for
This works especially well if you:
- Want an easy ride that covers a lot of Stanley Park in about two hours.
- Like the freedom of going at your own pace while still getting guided context.
- Prefer listening to commentary rather than following a person’s pace.
- Have a group where language matters; multi-language support is a real benefit.
It’s also a solid pick for visitors who want a “first-timer” loop that doesn’t feel chaotic. You get the iconic stuff, plus beaches, in a structured way thanks to the GPS audio and route.
If you hate phone-based navigation or you know your phone locks itself constantly, you’ll have to manage that before you start. The experience depends on your setup working smoothly.
Should you book this Stanley Park GPS audio bike tour?
If your goal is a low-stress, high-scenery Stanley Park ride, I’d book it. The $6 price is fair for what you get: GPS map guidance and landmark-by-landmark audio that makes the loop more meaningful than just riding around.
I’d also book it if your group includes different language preferences, since English and Spanish are supported.
Skip or reconsider if:
- You don’t want to deal with audio on a phone (headphones aren’t included, and the GPS audio may depend on keeping your phone unlocked).
- You’re expecting the bike rental to be included in the ticket price.
Bottom line: this is a great “do it your way” option for Stanley Park, as long as you treat the phone setup as part of the tour and budget a little extra for the bike rental.