REVIEW · VANCOUVER
Photography & Rockies Road Trip
Book on Viator →Operated by Nature PhotoHikes · Bookable on Viator
Jasper looks better when you time the light. This 5-day Rockies road trip is built around photography and nature stops, with a professional photographer guide helping you find the best angles and moments. You’ll move fast between world-famous parks, but the plan isn’t random. It’s designed to get you to the right places when the light cooperates.
I especially like two things: the focus on real camera coaching (smartphone and DSLR tips, not just vague advice) and the number of chances for wildlife and scenic moments along the way. On top of that, the guide—often called Nafees (sometimes Nash)—has a calm, safety-minded style that stood out for solo travelers in the feedback I read.
One thing to consider: this experience is weather dependent. If conditions aren’t good, you may need flexibility, because some viewpoints and photo plans rely on visibility and trail conditions.
In This Review
- Key points you’ll care about
- Why this photo-first Rockies road trip makes sense
- Small-group logistics: vans, pacing, and camera-ready breaks
- Day 1 Jasper National Park: the long drive that sets up great photos
- Day 2 Maligne Canyon, Sulphur Skyline, and Miette hot springs
- Day 3 Athabasca Falls, Icefields viewpoints, and Peyto Lake
- Day 4 Lake Louise, Plain of Six Glaciers, and Moraine Lake timing
- Day 5 Emerald Lake and Natural Bridge in Yoho National Park
- What the pro photographer guide actually helps with
- Hiking, camping, and what to bring for a smooth week
- Price and value: what you’re paying for
- Who this tour fits best (and who might want a different format)
- Should you book this Photography & Rockies Road Trip?
- FAQ
- What time does the tour start, and how does pickup work in Vancouver?
- How long is the Photography & Rockies Road Trip?
- How many people are in the group?
- What’s included in the price?
- What isn’t included?
- What happens if weather conditions are poor?
Key points you’ll care about
- Lighting-first planning that helps you frame shots at the right times, not just at the right locations
- Smartphone + DSLR instruction so you can improve even if you shoot with your phone
- More wildlife moments than you expect, especially around the canyon and falls areas
- Hot-spring break at Miette plus hikes that are manageable for people in reasonable shape
- Max 5 travelers so you get attention without feeling lost in a big bus
- Food isn’t included, so snacks and drinks matter, especially on Lake Louise/Moraine days
Why this photo-first Rockies road trip makes sense
The Rockies can be stunning no matter what. The difference here is that the trip is organized around photography—timing, positioning, and how you physically work the scene. That matters because the “best” view on a map can look flat in bad light, and great light can vanish if you arrive late.
You’re also not just doing pull-off-and-go sightseeing. You get professionally led hiking, plus camping as part of what’s included. That combination tends to produce more real nature time, not just hours parked by a parking lot sign.
Finally, this is a compact group. With a maximum of 5 travelers, you’re more likely to ask questions and get adjustments on your technique. And when it’s time to chase a shot, a smaller group usually means fewer delays and less chaos.
You can also read our reviews of more photography tours in Vancouver
Small-group logistics: vans, pacing, and camera-ready breaks
This tour starts at 8:00 am with pickup offered from a prearranged Vancouver location of your choice. From there, you’re in a vehicle with a driver/guide and a photographer guide, and your days are organized around park stops and short hikes.
You should expect a road-trip rhythm: drive, stop, shoot, hike, repeat. Each day includes multiple major stops, and the timing is tight enough that you’ll want to pack efficiently. The best part is that the schedule is built to help you use light and avoid wasting time when conditions aren’t ideal.
The trip also uses a mobile ticket, and confirmation is typically received within 48 hours of booking (when availability allows). One more practical note: there’s a minimum number of travelers to run the booking, so always plan a little flexibility on your calendar.
Day 1 Jasper National Park: the long drive that sets up great photos
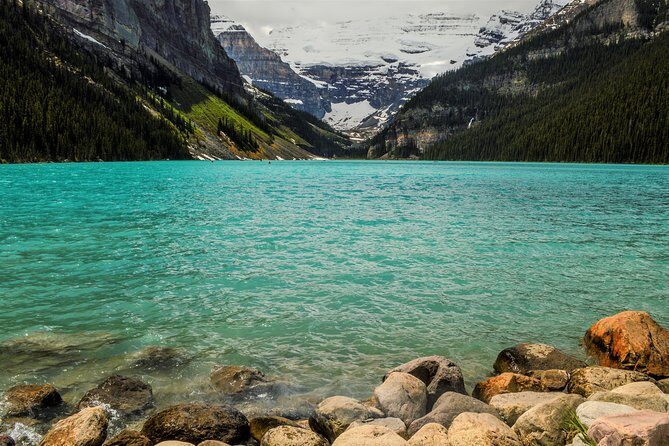
Day 1 is all about getting into the heart of the Rockies. You’ll drive to Jasper National Park through Kamloops, which is a long but useful start. The road is part of the experience here because you’re positioning yourself for the best light once you hit the mountain zones.
Jasper is a top choice for photographers because you get a mix of wide views, forest edges, and open areas where wildlife can appear. The trip’s structure aims to optimize where you stand and when you arrive, which helps your images feel intentional instead of like travel snapshots.
Hiking on day 1 can include Jasper-area trails depending on conditions; one participant highlighted Parker Ridge as a favorite spot. That’s the kind of detail that tells you the guide is thinking about viewpoints, not just ticking off famous names.
Potential drawback for day 1: you’re coming from Vancouver and the day begins early. If you’re easily worn down by long drives, plan to be patient with your energy levels and keep your camera gear compact.
Day 2 Maligne Canyon, Sulphur Skyline, and Miette hot springs
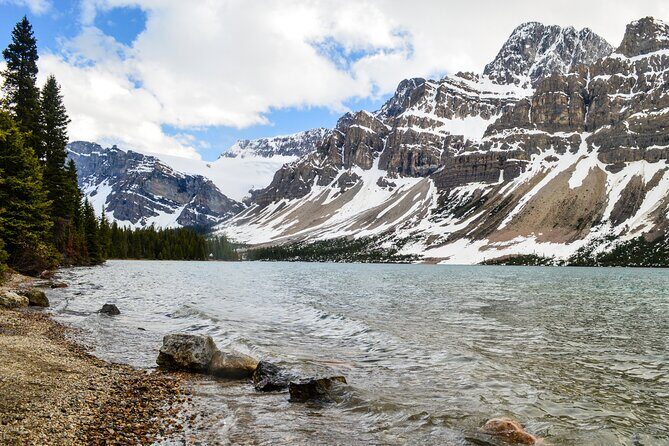
Day 2 is where the trip leans into variety. You start at Maligne Canyon, which is great for both photos and walking. Canyons give you strong depth—leading lines, texture, and a sense of scale. You’ll also have a chance to look for wildlife, and the feedback I read said opportunities came up more often than expected.
From there, you’ll hike Sulpher Skyline trail and then head for a dip at Miette hot springs. That hot-spring stop is more than a fun break. It’s a recovery moment that helps you keep enjoying the rest of the week instead of feeling cooked by back-to-back outdoor days.
The hiking here is described as not too demanding for people in reasonable shape. Still, the best results come when you bring shoes with real traction and keep your layers ready. In mountain weather, conditions can change quickly, and you want to be comfortable enough to stay focused on composing shots.
If you care about photography, day 2 is also a good day to practice small adjustments: angle your feet, move 10 steps sideways, then re-check your framing. With a guide coaching you, it’s the easiest day to turn effort into improvement.
Day 3 Athabasca Falls, Icefields viewpoints, and Peyto Lake
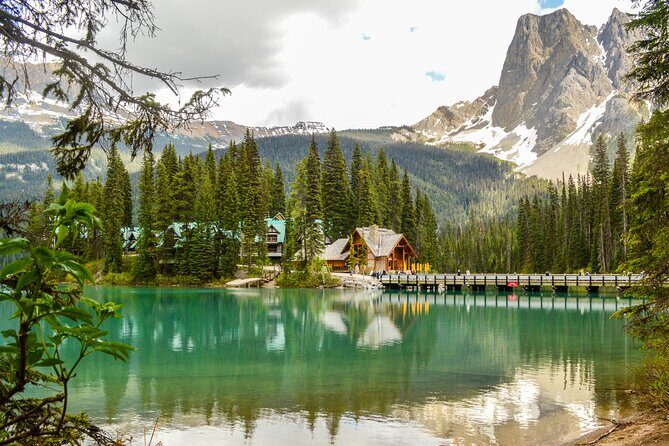
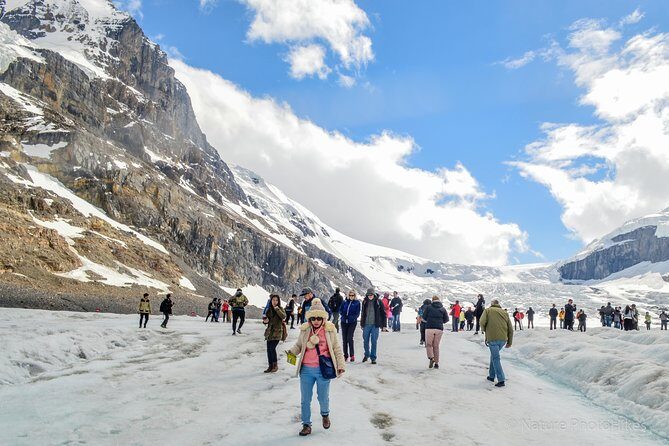
Day 3 is a classic Rockies day: Athabasca Falls, time in Jasper town, lakes like Pyramid and Patricia, and major stops along the Columbia Icefields area. You also get Peyto Lake as part of the day’s photo circuit.
Falls are great for motion and dramatic composition, but they’re also a practical challenge because mist can fog lenses and water can soak gear. This is where the small habits matter—one review advice that’s worth repeating: bring a cloth to wipe your camera lens or smartphone screen if unexpected rain moves in.
Peyto Lake is typically about viewpoint discipline. The best shots come from choosing a spot where you can separate foreground detail from the main subject. That’s exactly what the photo-first structure helps with. You’re not just walking up and shooting randomly—you’re learning how to build an image.
One more note: you’re moving through multiple environments in a single day. That can be tiring, but it also gives your photography a broader range of textures: waterfall power, lake color, icefields scale, and forest framing.
If you only have one “camera focus” day, day 3 might be it. It’s packed with iconic scenes that reward careful timing and steady technique.

Day 4 Lake Louise, Plain of Six Glaciers, and Moraine Lake timing
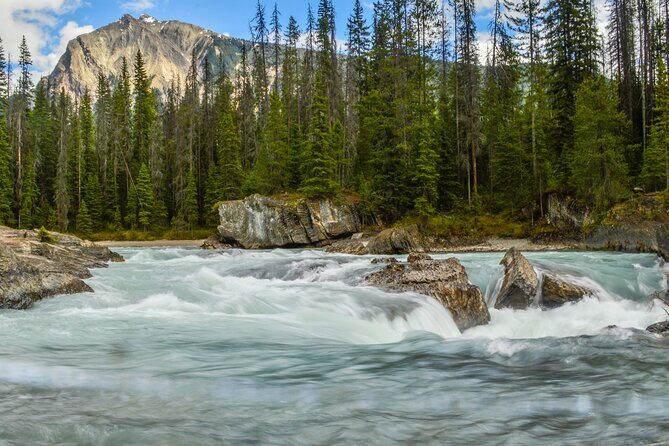
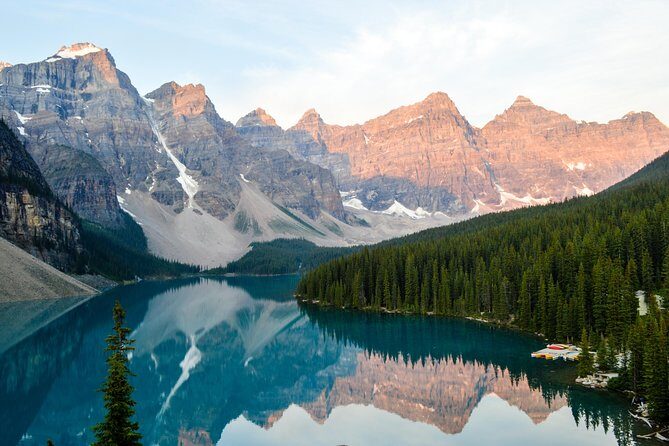
Day 4 is where many people start dreaming out loud: Lake Louise and Moraine Lake. You’ll visit Lake Louise, hike Plain of Six Glaciers and the Teahouse, and then stop at Moraine Lake.
This is a day that rewards patience. Teahouse hikes tend to involve steady effort, and the reward comes from finding a composition that makes the climb feel worth it. Even if you’re not aiming for perfection, a guide can help you notice things like where the light hits the water and how to keep the horizon clean.
The Plain of Six Glaciers area is also a good place to practice “lens economy”—don’t carry more than you need. Reviews suggest keeping camera equipment light and compact makes the hiking part easier and helps you stay present. If you haul heavy gear, you’ll start cutting your time short, and you’ll miss photo moments.
Practical tip from the feedback: bring snacks to Lake Louise/Moraine. When you’re out in remote areas, food gaps are real. A small snack plan helps you stay focused on the hike and the photos instead of hunting for energy.
Day 4 is also highly weather dependent. Clear skies and good visibility make a huge difference here, so keep your expectations flexible.
Day 5 Emerald Lake and Natural Bridge in Yoho National Park
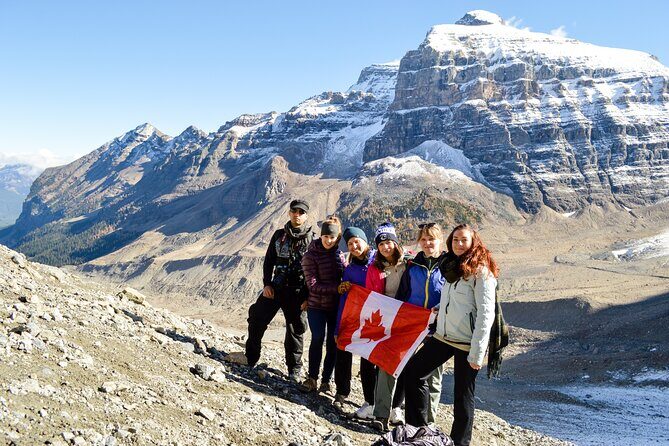
Day 5 is shorter on paper—about 1 hour at Emerald Lake—but it’s still a meaningful capstone. Emerald Lake is a signature Yoho stop, and the color and setting tend to create instant photo opportunities.
Because the time is limited, your best strategy is to decide quickly what you want: wide establishing shots, close details, or a quick path to a slightly different angle. A pro guide helps you do that without wasting time.
You’ll also visit Natural Bridge, which adds a different kind of subject. Instead of chasing big scenic panoramas, you can focus on shape and framing—something that can refresh your photography after longer driving days.
One thing to keep in mind: day 5 is likely to feel more like a “final set” than a full day of hiking. That’s a good thing if you want to end the trip energized and ready to download your photos, not exhausted beyond recovery.
What the pro photographer guide actually helps with
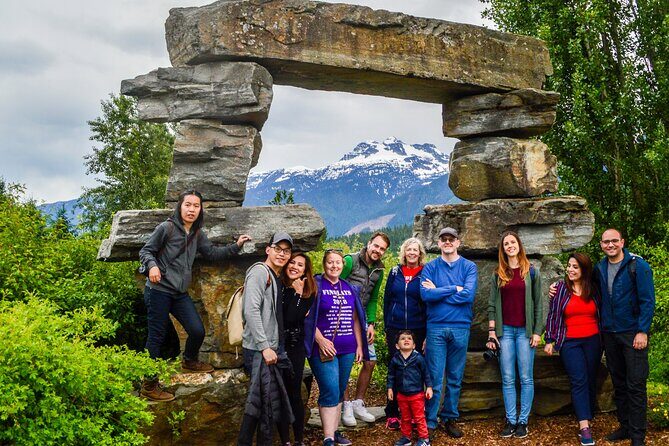
This is not a basic scenery tour with a camera bonus. The professional photographer guide is integrated into how the days run.
From what people reported, Nafees shared helpful tips for both smartphone and DSLR settings and guided you on composition choices—like how to optimize lighting and location for scenic results. That matters because most visitors know where to stand. Fewer know how to tweak settings, change perspective, and work with imperfect conditions.
You’ll also benefit from having someone who can respond in real time. If clouds roll in or the light shifts, you need to adjust fast. A guide who understands the area helps you keep moving toward better shots instead of waiting around hoping for the perfect sky.
And beyond photography, the guide’s style comes across as patient and safety-minded. One solo traveler specifically mentioned feeling secure, which is a real advantage when you’re traveling on your own and still want to explore hard places.
Hiking, camping, and what to bring for a smooth week
The included plan includes a professionally led hiking and camping experience, so you’re doing more than daylight sightseeing. The good news is the hikes are described as not too demanding for people in reasonable shape. That still doesn’t mean you can wing it with the wrong shoes.
Here’s what you should bring based on the practical advice that kept showing up:
- Comfortable, broken-in shoes with traction
- Layered clothing for changing conditions
- A plan to keep camera gear light and compact
- A small cloth to wipe lens or smartphone screen
- Snacks, especially for longer stops like Lake Louise/Moraine
Camping also means you’ll want to think like a camper: keep your essentials organized so you can focus on shooting and walking. If you’re used to traveling with minimal gear, you’ll likely find this suits your style. If you tend to pack heavy equipment, it’s worth trimming your kit.
Also, remember: the trip works best when you can stay flexible. Weather affects visibility and trail conditions, and the guide will usually adjust to keep the experience moving.
Price and value: what you’re paying for
At $1,158.78 per person for about 5 days, this isn’t a budget add-on. But it can be good value if photography and guided nature time are your priorities.
Here’s why the pricing can make sense:
- National park fees are included
- You get a driver/guide plus a professional photographer guide
- You’re not just driving; you’re doing professionally led hikes and an included camping experience
- Transportation is handled for you, which matters when you’re traveling between multiple major parks
What’s not included is important for your personal budget. Food and drinks aren’t included, and upgrades in accommodation (hotel/hostel) aren’t included either. Also, some activities like canoe rentals or gondola tickets aren’t included.
In other words, the price covers the guidance, access, and transportation backbone. You cover meals and any optional add-ons. If you plan ahead for snacks and a realistic meal budget, you’ll feel more in control.
Who this tour fits best (and who might want a different format)
This tour seems ideal if you want:
- A guided Rockies road trip focused on photography
- Instruction that helps you improve, whether you shoot with a phone or DSLR
- A small group with enough attention that you don’t feel ignored
- Nature stops that include hiking and at least one hot springs break
It may be less ideal if you want a slow, luxury pace or a lot of free time in each location. The day structure moves. Even when hikes are manageable, the experience is active and timed around photo moments.
Solo travelers also appear to do well here. One solo woman reported feeling safe and comfortable, and the group vibe described in feedback suggests it can feel social without being chaotic.
If you’re the type who hates adapting to weather changes, you may feel frustrated. If you can roll with shifting plans, this is a fun way to turn a once-in-a-lifetime route into actual photo skills.
Should you book this Photography & Rockies Road Trip?
If your goal is better photos and real guided time in some of Canada’s most iconic parks, I think you should seriously consider booking. The combination of small group size, photographer coaching for phone and DSLR, and the way the days are organized around light is the core strength here.
I would only hesitate if you’re tightly scheduled, hate hiking even when it’s described as moderate, or don’t want to think about meals and snacks. Also, if you can’t flex your dates due to weather, the Rockies can be unpredictable.
For the right person, this is one of those trips where the value isn’t just the views. It’s the skills you pick up while you’re standing in front of them.
FAQ
What time does the tour start, and how does pickup work in Vancouver?
The tour starts at 8:00 am. Pickup is offered, and you meet at a prearranged Vancouver location of your choice.
How long is the Photography & Rockies Road Trip?
The duration is approximately 5 days.
How many people are in the group?
This experience has a maximum of 5 travelers.
What’s included in the price?
The price includes the driver/guide, national park fees, a professional photographer guide, professionally led hiking and camping experience, and transportation.
What isn’t included?
Food and drinks are not included, and activities like canoe rentals or gondola tickets aren’t included. An accommodation upgrade to hotel/hostel is also not included.
What happens if weather conditions are poor?
This experience requires good weather. If it’s canceled due to poor weather, you’ll be offered a different date or a full refund.