REVIEW · VANCOUVER
Photography in Rainforest & Suspension Bridge
Book on Viator →Operated by Nature PhotoHikes · Bookable on Viator
Rain makes Vancouver photos better. This small-group Lynn Canyon hike turns a rainy day into a hands-on photo lesson—complete with a suspension bridge, waterfalls, and real-time coaching. I like that you get instruction for both smartphone cameras and DSLRs (you can even borrow one), and I really like the pace: it’s slow enough for you to ask questions while you walk. One heads-up: the trail is “easy hiking” but it still has stairs and can feel tough on sore legs.
Over about 4 hours (starting at 10:00am), you’ll cover two stops and practice the kinds of shots that actually matter here: waterfalls for long exposures, close-up nature details, and framing portraits with the rainforest as your backdrop. If rain or mist is heavy, bring footwear and layers you trust—this tour runs in all weather, so you’ll be outside.
In This Review
- Photography in Rainforest & Suspension Bridge: Key Highlights
- Why Lynn Canyon Works So Well for Photo Lessons
- Pickup and Timing: What the Half-Day Really Means
- Stop 1: Lynn Canyon Park Suspension Bridge and Waterfall Shots
- Stop 2: Cleveland Dam—A Photo Practice Pause
- How the Guide Teaches: Phone Tips, DSLR Options, and One-on-One Help
- Gear, Rain, and Comfort: What to Bring for a Real Rainforest Day
- Price and Value: Does $86.08 Make Sense?
- Who Should Book This Photography Hike (and Who Should Skip It)
- Should You Book This Lynn Canyon Photography Tour?
- FAQ
- Is pickup available?
- What’s the tour duration?
- Where does the tour go?
- Can I use a smartphone instead of a DSLR?
- Can I borrow a DSLR?
- How many people are in the group?
- What should I wear for the weather?
- Is food included?
Photography in Rainforest & Suspension Bridge: Key Highlights
- Up-close instruction in a group of up to 6 so you don’t get lost while learning settings and framing
- Smartphone and DSLR coaching, plus the option to borrow a DSLR with no extra charge
- Lynn Canyon Park’s old-growth forest with a suspension bridge, waterfalls, and photo-worthy pools
- A short, practical hike with stairs, designed for getting you to the right viewpoints without a fitness test
- Your guide helps you shoot and also takes photos of you, so you leave with more than just scenery
Why Lynn Canyon Works So Well for Photo Lessons
Lynn Canyon is the kind of place where your photos get better fast, because the subject is already doing half the work. You’re in an old-growth rainforest, so you get natural texture—ferns, mossy edges, shaded paths, and water everywhere. Then add the suspension bridge and waterfalls, and you’ve got both movement and contrast: dark greens, bright foam, misty air, and clear shapes for wide-angle shots.
What makes this tour especially useful is that you’re not just wandering. You’re practicing specific shot types while your guide watches what you’re doing and corrects you on the spot. That matters in rainforest photography, because mist and mixed light can trick your phone into flattening contrast or turning waterfalls into dull blurs. With real coaching, you learn how to avoid that and get images that look crisp without turning the whole scene into noise.
I also like that the setting supports different camera styles. If you’re on a smartphone, you still get taught how to frame, stabilize, and time shots. If you’ve got a DSLR, you’ll get guidance for longer exposure-style waterfall effects and close-up details. This is a great setup for anyone who wants to leave Vancouver with “I can actually do this” skills, not just a list of places to visit.
You can also read our reviews of more photography tours in Vancouver
Pickup and Timing: What the Half-Day Really Means
This is a morning outing that starts at 10:00am, and it runs about 4 hours total. You’ll get pickup options from downtown and nearby east Vancouver/Burnaby areas, or you can meet in central Vancouver if your accommodation is farther out. From the core of the city, it’s roughly a 30-minute ride to reach the trail.
Once you’re at Lynn Canyon, the walking portion is described as easy hiking, with minimal elevation but several stairs along the way. Translation: you don’t need to be a mountain athlete, but you should be ready to go up and down steps repeatedly as you reach different viewpoints. If your legs are sensitive, plan to move slowly and give yourself time on the stairs.
Another detail that affects how you’ll enjoy the day: small-group size. With a maximum of 6 people, your guide can adjust the lesson to the camera types in the group and help you build a shot sequence. That’s why the time feels productive. You’re not rushing to hit photo spots; you’re learning how to arrive at them ready.
Also, you’re outside in real weather. The tour operates in all weather conditions, so you’ll want layers and shoes that handle damp ground. Rain in Vancouver isn’t a special event here—it’s part of the scenery, and it can actually help your photos look moody and dramatic.
Stop 1: Lynn Canyon Park Suspension Bridge and Waterfall Shots
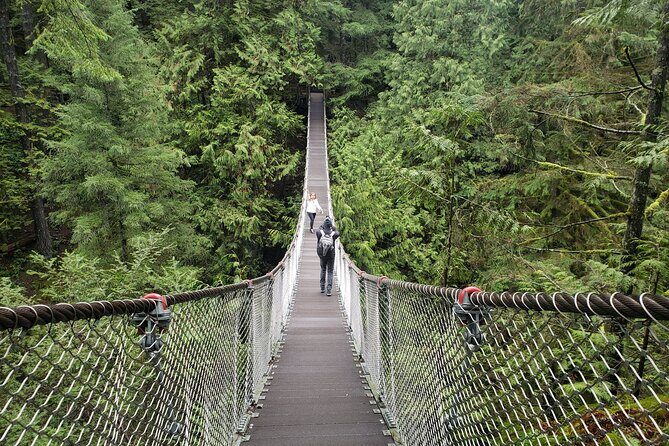
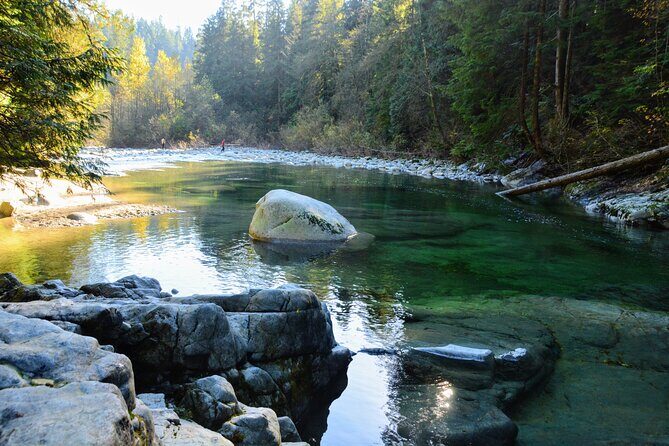
Stop 1 is Lynn Canyon Park, and it’s the main event. Expect an old-growth rainforest experience with a suspension bridge, plus waterfalls and pools that are perfect for practicing multiple photo styles in a single walk.
Here’s why this stop is such a strong classroom:
- Waterfalls teach timing. Water moves constantly, so your shutter speed (or equivalent smartphone technique) matters. Your guide focuses on how to get long-exposure-style waterfall effects—turning chaos into smooth flow.
- Pools and mist teach contrast. In damp forests, backgrounds can look gray. You learn how to separate your subject from the scene so the waterfall and bridge don’t blend into the background.
- The bridge teaches composition. Suspension bridges create strong leading lines and symmetry. Even if your camera is just a phone, the bridge structure gives your framing something clean to work with.
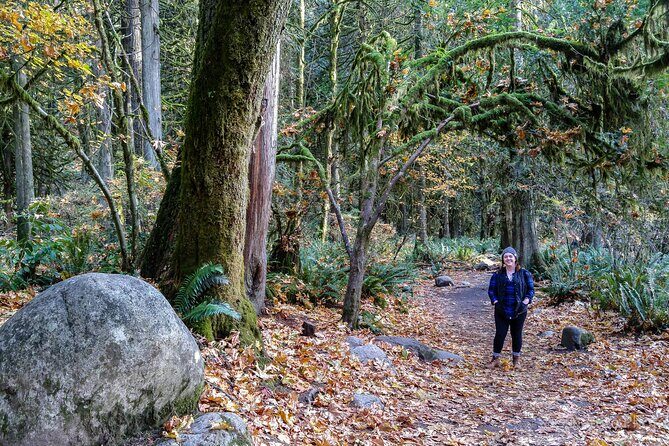
- Rainforest details teach close-up skill. The tour includes macro-style practice for flowers and nearby nature details, which helps you avoid the “everything looks the same” problem that happens when people only shoot wide shots.
The trail is described as short and easy, but still includes stairs. That’s not a deal-breaker, but it’s something you should plan around. In reviews, people call out that it can be hard on the legs even though it’s not an extreme hike. If you’re okay with a stair rhythm, you’ll likely find this portion relaxing—especially when your guide slows down so you can get set up for shots instead of constantly walking and hoping.
Stop 2: Cleveland Dam—A Photo Practice Pause

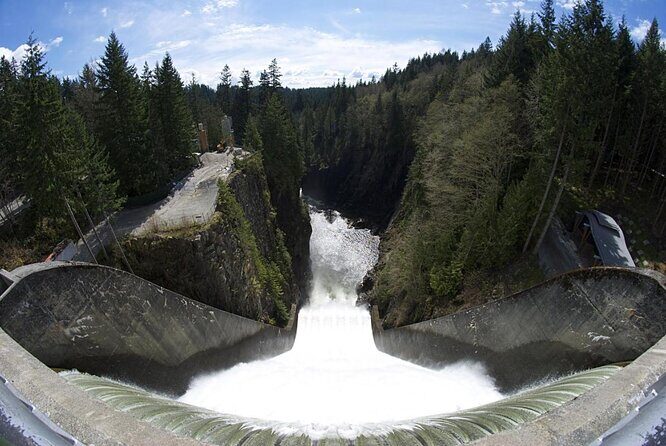
After Lynn Canyon, you’ll make a second stop at Cleveland Dam. The day’s main instruction themes stay the same—wide-angle views, portrait framing, macro details, and long-exposure learning—but this stop gives you a change of scenery and a new set of angles.
Because the tour data doesn’t spell out exact viewpoints at the dam, treat it as a practice moment. Think of it as time to refine what you learned at Lynn Canyon: how to move your feet to improve your background, how to choose a focal point, and how to manage lighting when the light changes from forest shade to brighter open areas.
If you’re using a smartphone, this is often where you can apply what you practiced earlier: lock your composition, stabilize (even with simple techniques like steady breathing), and adjust your shot so the scene doesn’t look washed out.
If you’re using a DSLR, a dam stop is a good chance to experiment with settings while staying in a controlled pace. You won’t be dragging gear through a long, strenuous hike. You’ll have time to adjust without feeling like you’re behind schedule.
How the Guide Teaches: Phone Tips, DSLR Options, and One-on-One Help
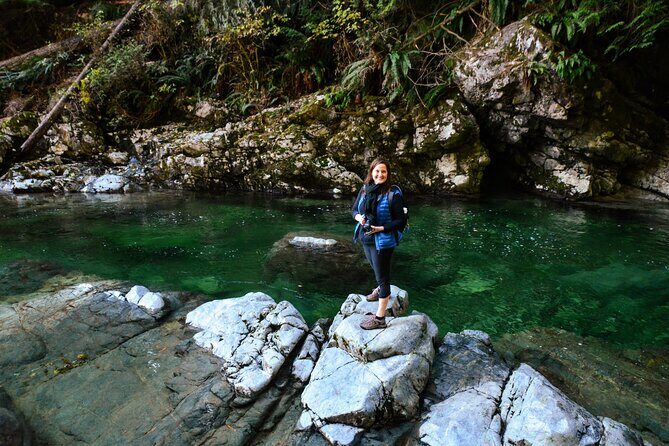
What people love most here is the guide’s teaching style. In the feedback, guides are described as patient, pleasant, and highly engaged, with a focus on making you comfortable while you learn. You don’t just get a lecture; you get help that follows your real camera as you use it.
A few key ways the coaching shows up in practice:
- Phone coaching that actually fixes common problems. Reviews mention improvements made directly on smartphones, including tips that help shots look better without heavy editing.
- DSLR support without making you feel behind. If you bring a DSLR, you’ll get help with the right approach for scenic shots and long exposure waterfall effects.
- DSLR borrowing at no extra charge. If you don’t want to bring your own camera, you can use one from the guide, which lowers the barrier to trying real camera settings.
- Plenty of one-on-one attention. With a maximum of 6 people, you’re not competing for help. Your guide can slow down for you, explain what to change, and check your results before you move on.
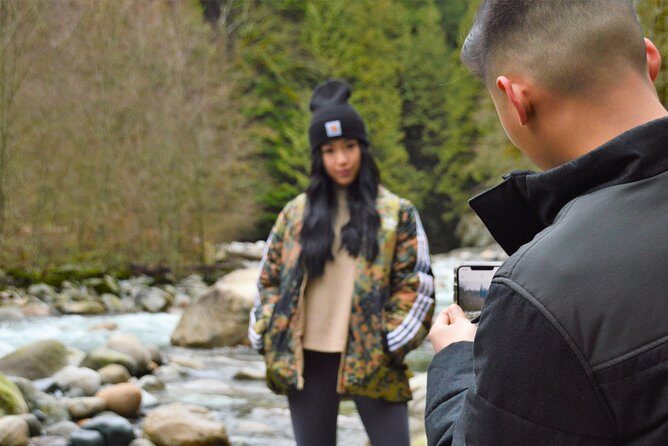
Something else I really appreciate from the tone of the reviews: you don’t leave feeling like you only took photos for yourself. Your guide also takes photos of you during the shoot. That’s a small but important value shift—suddenly you’re in the pictures, and you’re not relying on strangers to take your group shot at an awkward angle.
You’ll also likely get practical suggestions beyond photography. Some guides add recommendations for other Vancouver stops. Even if you only take one or two ideas, that can improve the rest of your trip.


Gear, Rain, and Comfort: What to Bring for a Real Rainforest Day
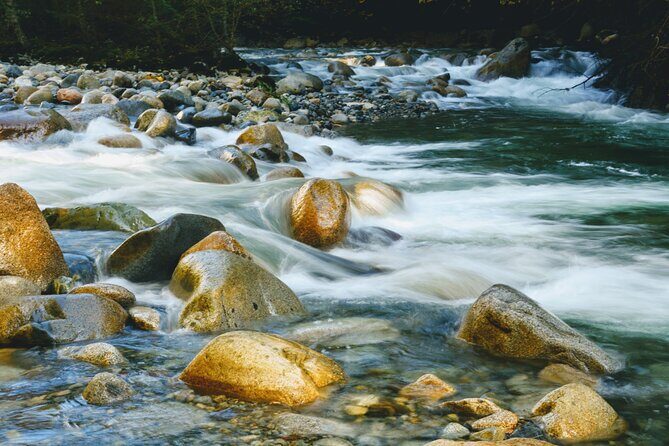
This tour runs in all weather conditions, so your job is simple: dress so you’re comfortable outside for a few hours on damp paths. The terrain is described as easy with minimal elevation but multiple stairs, which makes footwear a bigger deal than you might expect.
Here’s what I’d prioritize based on the conditions and trail type:
- Waterproof or water-resistant shoes with traction
- Layers you can adjust if it’s chilly under tree cover but warmer along open sections
- A rain shell or light waterproof jacket
- A camera strap or secure way to carry your gear (if you’re bringing a DSLR)
- If you’re on a smartphone: bring it with a charging plan if your battery runs fast in cool damp weather
If you like, you can borrow a DSLR from the guide, but you’ll still need to handle the basics: keeping your device protected, steadying for longer shots, and not rushing when you should set up.
One more comfort note: even though the hike is called easy, reviews highlight that stairs can be tough. The best way to handle it is to go at the guide’s pace, stop when you need to, and treat the stairs as part of the composition process. Each step gets you a new angle, so slow walking is actually part of getting the photos you want.
Price and Value: Does $86.08 Make Sense?
At $86.08 per person for about 4 hours, the cost is reasonable if you value instruction and not just admission to a scenic area. You’re paying for:
- a professional photographer guide
- transportation
- a small group experience (up to 6 travelers)
- a guided hiking structure that gets you to the right viewpoints
- access to a DSLR borrow option
- a guided photoshoot, including help getting photos of you
If you were to do this on your own, you’d likely spend money on transport and you’d still face the biggest challenge: learning how to actually shoot waterfalls and rainforest scenes in mixed light. This tour turns those tricky moments into teachable steps, with the guide watching what you’re doing and correcting it in real time.
Is it overpriced? No—especially if you’re someone who wants to improve quickly and leave with usable images. If you only want a scenic walk with no interest in photography, you might find the cost less compelling. But if you care about getting better pictures on a phone or DSLR, the value lands.
Also, the reviews show very high recommendation rates and a near-perfect rating. For a photography-focused tour, that level of satisfaction usually means the teaching matches the setting—and that’s what you’re paying for.
Who Should Book This Photography Hike (and Who Should Skip It)
This tour fits best if you want to learn how to photograph nature in a practical way. It’s especially good for:
- couples and friends who want great photos without splitting up
- travelers who rely on their smartphone and want more control
- DSLR owners who want guidance for waterfall and close-up shots
- people who appreciate a guided route with a small group
It also sounds like a friendly option for older travelers, since reviews mention the guide taking extra care and adjusting to guests in their eighties. The trail still has stairs, so your comfort matters—but the day isn’t framed as a hard expedition.
Who should skip it? If you hate stairs or you’re dealing with a mobility issue, you might find the repeated steps uncomfortable, even though the hike is described as easy. Also, if photography instruction is not your goal and you’re only after a casual walk, you could get a similar nature experience on your own without the coaching portion.
Should You Book This Lynn Canyon Photography Tour?
If you want a rainy-day plan that feels useful and genuinely social, I think this is a strong pick. The biggest reason to book is the teaching approach: you’re not just seeing the suspension bridge and waterfalls—you’re learning how to photograph them with help that fits your camera, whether it’s your phone or a borrowed DSLR.
Book it if you:
- want small-group, one-on-one coaching
- care about waterfall and close-up techniques
- want pictures that include you, not only the scenery
- like the idea of learning in a natural setting within a short day
Skip it if you:
- can’t do stairs comfortably
- only want a self-guided hike with no interest in photo practice
If your goal is to leave Vancouver with better photos and a clearer photography workflow, this tour is one of the more practical ways to get there.
FAQ
Is pickup available?
Yes. Pickup is offered if your accommodation is in or near downtown/east Vancouver/Burnaby. Otherwise, you’ll meet at a central location.
What’s the tour duration?
It runs about 4 hours. The hiking time is listed as about 3 hours, with 2 hours for private solo guests.
Where does the tour go?
You’ll visit Lynn Canyon Park and Cleveland Dam.
Can I use a smartphone instead of a DSLR?
Yes. The tour is designed for both smartphone cameras and DSLR cameras, and your guide will help you with photo settings and framing.
Can I borrow a DSLR?
Yes. DSLR cameras can be borrowed from your guide at no extra charge.
How many people are in the group?
The tour has a maximum of 6 travelers.
What should I wear for the weather?
The tour runs in all weather conditions. Dress appropriately for rain and damp conditions.
Is food included?
No. Food and drinks aren’t included.