REVIEW · ALBERTA
Abraham IceBubble/Sunwapta, Athabasca Falls, Peyto, Bow Lake
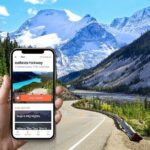
Book on GetYourGuide →Operated by Vancouver Journey. · Bookable on GetYourGuide
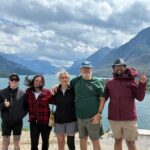
Frozen bubbles make winter feel magical. This day trip is built around the big ice-bubble moment at Abraham Lake (or seasonal Sunwapta Falls), plus easy snowshoe time with complimentary gear. It’s also a small-group format (up to 14), which means you get more real photo stops and less rushing.
The main drawback is simple: it’s a 10-hour winter road day, so you’ll want to plan for long stretches on the drive and bring your own lunch.
In This Review
- Quick hits: why this winter Rockies tour works
- Abraham Lake ice bubbles vs Sunwapta Falls: the seasonal star attraction
- Price and value: what $60 buys in the Rockies
- The long winter day: timing, driving, and how to stay comfortable
- Pickup and drop-off: choosing Calgary, Canmore, Banff, or Lake Louise
- Route highlights: what you’ll actually see between the big stops
- Stop 1: Abraham Lake ice bubbles (about 1.5 hours)
- Stop 2: Sunwapta Falls photo stop (about 30 minutes)
- Stop 3: Peyto Lake’s winter transformation (about 45 minutes)
- Stop 4: Bow Lake quick hits (about 15 minutes) plus big views
- Crowfoot Glacier viewpoint and wildlife viewing: the short stop that can surprise you
- Athabasca Falls plus Jasper time: your mid-to-late day break from lakes
- Snowshoeing and crampons: safety gear that makes the views possible
- Food and warm drinks: plan your lunch like a pro
- Guides and the photo advantage: how this tour helps you get the shot
- Weather changes: what to expect when winter refuses to cooperate
- Should you book this Abraham Ice Bubble and Lakes tour?
- FAQ
- When will I visit Abraham Lake versus Sunwapta Falls?
- How long is the tour?
- Where are the pickup and drop-off locations?
- What time does pickup start from Calgary, Canmore, Banff, and Lake Louise?
- What winter activities and gear are included?
- Are hot drinks or snacks provided?
- Do I need to bring lunch?
- What should I bring for the winter conditions?
- Are there any restrictions on what I can bring?
- What is the cancellation policy and can I pay later?
Quick hits: why this winter Rockies tour works
- Ice-bubble magic (seasonal): Abraham Lake is the star in winter months, with other icy highlights depending on dates.
- Snowshoeing and traction help: you’ll get complimentary snowshoe equipment and free crampons rental for safer walking.
- Hot coffee or tea on the cold drive: warm-up breaks are built in so you don’t feel stuck outside for hours.
- Big sights in one day: Banff and Jasper National Park highlights in a single loop, with multiple lake and falls stops.
- Guide energy plus photo help: multilingual guides often help with timing, walking routes, and getting your shots.
Abraham Lake ice bubbles vs Sunwapta Falls: the seasonal star attraction
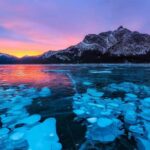
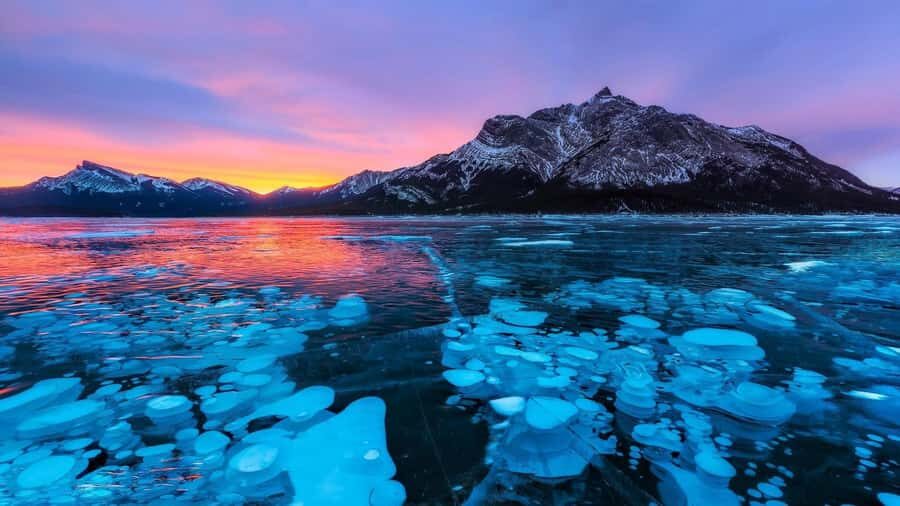
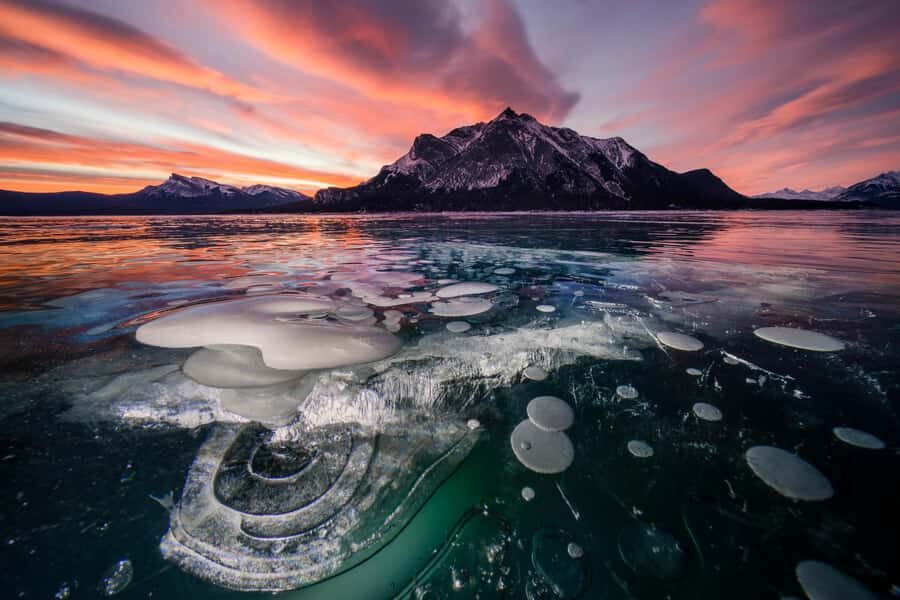
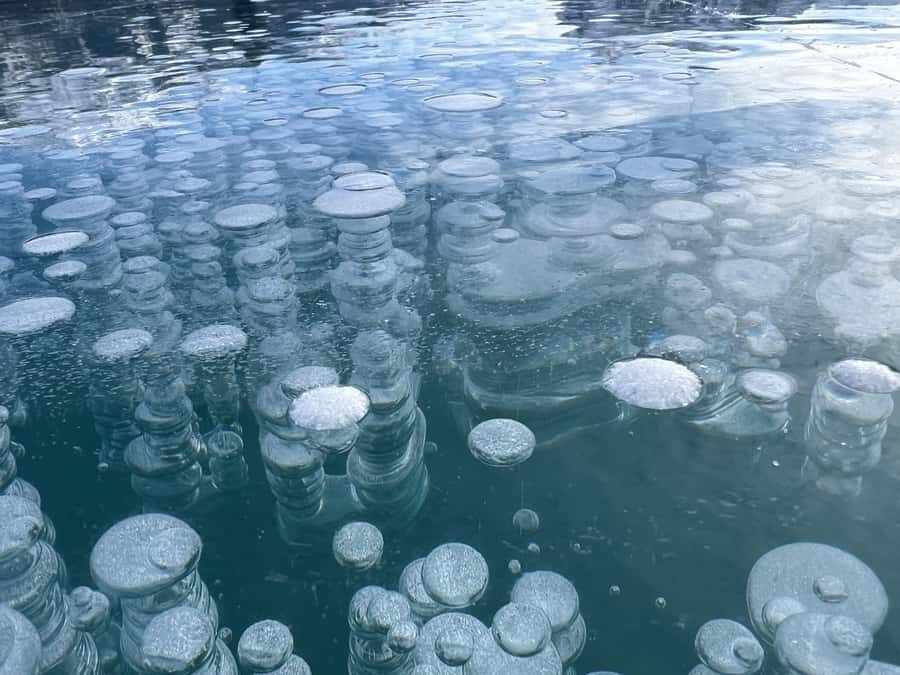
This tour is designed around frozen-water beauty, but the exact “main show” changes with the season. If you’re traveling 12/1–3/31, you’re going to Abraham Lake for the classic ice bubble lake phenomenon—those trapped bubbles frozen under the surface can look unreal. If you’re going 10/14–11/30 or 4/1–5/31, you’ll focus on Sunwapta Falls instead, swapping the headline moment to match what’s workable that time of year.
Why that matters for your expectations: ice-bubble viewing is weather- and temperature-dependent. Even when the bubble field is visible, you’ll get the best results by dressing for cold and keeping your eyes open at the photo viewing points. Your guide also has flexibility to adjust the order when conditions change, which is a big deal in winter driving country.
You can also read our reviews of more tours and experiences in Alberta.

Price and value: what $60 buys in the Rockies
At about $60 per person for a 10-hour day, the value is mostly in what you don’t have to manage yourself. You get a comfortable, air-conditioned vehicle, designated pickup and drop-off points, a live multilingual guide, and traction gear for icy walking.
Where the value gets real is the mix of time and gear. Instead of doing a DIY drive where you’re stuck figuring out where to park, what’s safe to walk, and when to turn around, you’re paying for a plan that moves you efficiently between frozen lakes and falls. Add the free crampons rental and the complimentary snowshoe equipment, and you’re not spending extra to make the day doable.
Also: lunch isn’t included. That’s not a small note in winter—there aren’t restaurants or fast food at the attraction stops—so you should plan for a packed meal from home or a quick grab before pickup.
The long winter day: timing, driving, and how to stay comfortable
This is a one-day loop, and you should treat it like a winter expedition day even if it’s “only” 10 hours. The itinerary is full of short-to-medium photo and walking stops, which means you’ll spend plenty of time in the vehicle between viewpoints.
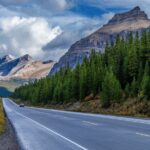
You’ll see multiple classic Rockies jump-off points as you head out and back, including passes by Cascade Mountain, Castle Mountain, and Vermilion Lakes (depending on your pickup). You’ll also roll into the Icefields region and then swing toward Jasper for more falls and lakes. It’s a lot of scenery in a single day, but you need the right winter rhythm: snack, water, warm layers, and steady breaks.
If you’re sensitive to motion, remember winter mountain roads can feel bumpy. Bring what you need for comfort—some people notice the ride more than others.
Pickup and drop-off: choosing Calgary, Canmore, Banff, or Lake Louise
Pickups are fixed, so choose the one that minimizes backtracking. The tour runs from two big starts and two Banff/Lake Louise-adjacent starts:
- 07:15 Calgary Downtown (Delta Hotels by Marriott Calgary Downtown)
- 08:40 Canmore Visitor Information Centre
- 09:00 Banff Caribou Hotel
- 09:50 Lake Louise Visitor Center
You’ll return to the same style of drop-off locations. The practical tip: arrive 15 minutes early. In winter, that extra buffer matters.
If you’re staying in Banff, this is one of those days where staying car-free is the whole point. You’ll get the route without needing to read weather, track road closures, or decide parking on the fly.
Route highlights: what you’ll actually see between the big stops
The day isn’t just Abraham Lake and a couple postcards. Your route layers in multiple viewpoints and “supporting characters” that make the scenery feel varied.
On the way, you’ll have:
- a quick pass-by of Crowfoot Glacier Viewpoint (photo stop),
- a wildlife viewing window (more on this in a second),
- and a pass-by of Tangle Creek Falls.
Then the main north-south energy kicks in with the key lakes and falls stops: Abraham Lake (seasonal), Sunwapta Falls (seasonal focus), Peyto Lake, Bow Lake, then Athabasca Falls, plus time in Jasper and visits to Patricia and Pyramid Lakes.
This matters because winter can shrink visibility. When one spot is foggy or snow-heavy, the itinerary still gives you enough options to find strong photo angles and memorable moments.

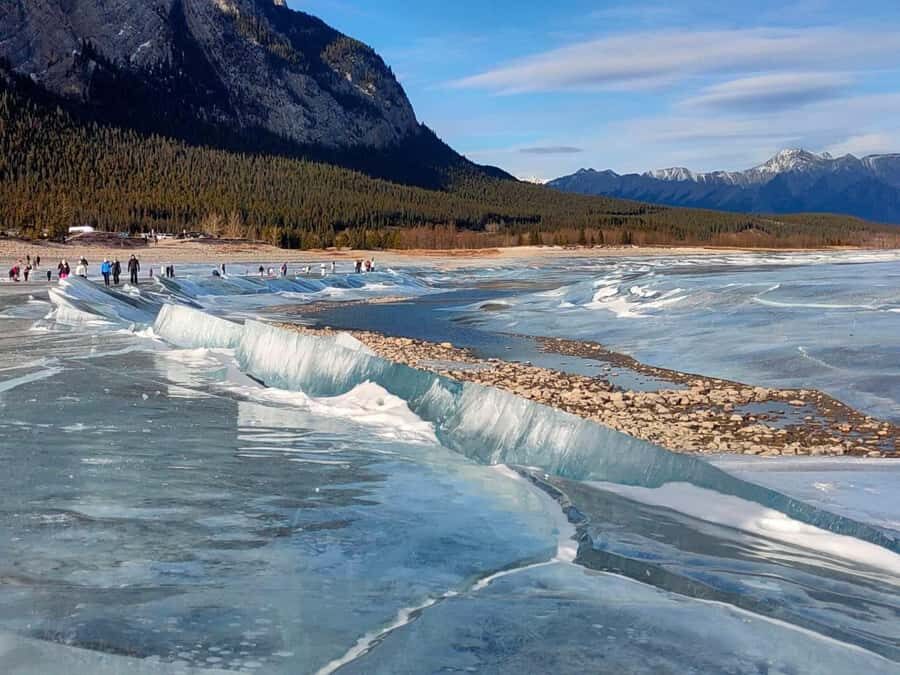
Stop 1: Abraham Lake ice bubbles (about 1.5 hours)

This is the stop many people book for: the idea that you can stand near a frozen lake and see bubbles trapped under the surface. When conditions are right, the ice can look speckled and magical, like a frozen underwater world.
You’ll get a photo stop plus time to visit and sightsee (about 1.5 hours). That’s enough time to:
- walk out carefully,
- pick your angles,
- and wait out small visibility changes.
Practical tip: use the traction you’re given. Even short walks on snow and ice can get sketchy fast. Your guide will help with the safe approach, and the included free crampons rental is there for a reason.
Also, when ice-bubble viewing is your goal, your camera settings and steady footing matter more than your zoom. If you’re not comfortable walking on frozen surfaces, this is exactly where crampons make the difference.
Stop 2: Sunwapta Falls photo stop (about 30 minutes)

Depending on your travel dates, Sunwapta Falls becomes a centerpiece or a big supporting stop. Either way, you’ll have a photo stop and sightseeing time of about 30 minutes.
Why this works even with limited time: frozen waterfalls often look best from multiple angles, and short time chunks are how you avoid rushing. In winter, weather can change quickly, and Sunwapta is a place where a quick reframe can turn a dull view into a strong one.
Your guide may also adjust the timing and route to match what’s accessible that day. So if something is blocked by heavy snow conditions, you won’t be stuck staring at a closed viewpoint.
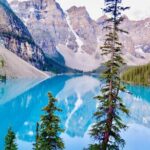
Stop 3: Peyto Lake’s winter transformation (about 45 minutes)
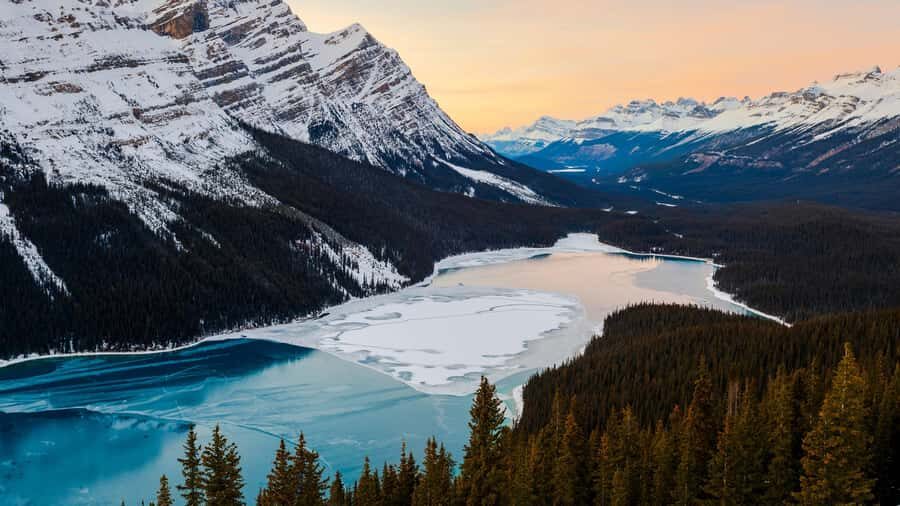
Peyto Lake in winter is a different mood than summer—more glow, more white spread, and that familiar wolf-shape silhouette turning into a snow-covered form. You’ll get photo stop, visit, and sightseeing time of about 45 minutes.
The practical consideration: winter conditions can make some viewpoints harder to reach. One day might be perfect; another day might bring heavy snowfall or reduced access. The good news is your guide is set up to reroute when needed, aiming for alternative frozen scenery instead of forcing you into unsafe conditions.
If you’re hoping for photos, treat Peyto as your main “stillness” stop. Slow down, use the time for careful framing, and don’t try to do it all in one minute.
Stop 4: Bow Lake quick hits (about 15 minutes) plus big views
Bow Lake is shorter on the clock (about 15 minutes), but the photo payoff can still be huge. This is the kind of stop where you move fast: step out, get your horizon line, shoot quickly, and then return before the cold drains you.
In winter, Bow Lake can look almost unreal—bright snow, dark pine, and steep peaks in the same frame. If you want a calmer moment, use this stop to breathe and reset after the longer walk at the earlier lake.
The best strategy here: wear your cold-weather layers so you’re not fiddling with clothes mid-stop. If you’re ready when you arrive, you’ll actually enjoy the viewpoint instead of managing gloves and camera straps.
Crowfoot Glacier viewpoint and wildlife viewing: the short stop that can surprise you
Your itinerary includes:
- a Crowfoot Glacier Viewpoint photo stop (about 10 minutes), and
- a wildlife viewing segment.
Ten minutes is just enough for a couple angles, especially if snow and wind are doing their thing. Use it to get your main “glacier backdrop” photo, then move on.
Wildlife is always a bonus, not a guarantee—but it’s real enough that you should be alert. On winter Rockies days like this, wildlife viewing can include big animals if you’re in the right place at the right time. If you’re lucky, you may spot something rare like a moose during the wildlife portion.
Either way, wildlife time is worth paying attention to because it slows you down. It pulls your brain out of picture-taking mode and back into the experience mode.
Athabasca Falls plus Jasper time: your mid-to-late day break from lakes
Later in the day, you’ll reach Athabasca Falls, with a visit time of about 20 minutes. Athabasca in winter isn’t about a lush, flowing scene—it’s about frozen power and dramatic shapes. Even in short visits, it gives your eyes a different kind of winter texture.
After that, you’ll have free time in Jasper (about 30 minutes). That’s your chance to warm up, use the restroom, and decompress. If you need to buy a quick snack or hot drink, that’s the moment to do it—because the attraction stops don’t include meals or fast food.
Then the final scenic notes come with Patricia and Pyramid Lakes (visit time not listed, but they’re included near the end). These are great for finishing with that quieter, snow-lined feel before you head back down the mountain.
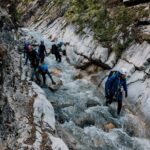
Snowshoeing and crampons: safety gear that makes the views possible
This is the part I’m most glad is included. You get complimentary snowshoe equipment and free crampons rental, which means you can actually enjoy the walking parts without turning the trip into a gear quest.
Why it matters: in winter, the biggest barrier isn’t your legs—it’s footing. Crampons help you step with confidence. Snowshoes help you move through snow without sinking or post-holing.
Your guide also focuses on keeping everyone safe, including helping with routes and making sure people are dressed properly for the weather. That kind of “small stuff” attention is what keeps a day like this fun instead of stressful.
Pack your own comfort layer system. You’re not just staying warm; you’re staying flexible enough to move safely.
Food and warm drinks: plan your lunch like a pro
You’ll want a winter eating strategy because the tour doesn’t include meals, and there are no restaurants or fast food options at the attraction points. Bring your own lunch. Keep it simple and calorie-friendly: sandwiches, wraps, snack bars, nuts—anything you can eat quickly while staying outside for photos.
The tour does include complimentary hot coffee or tea, which is a real morale boost on cold days. Many guides also provide water and snacks, and they may even add extra warm touches like hand warmers when conditions call for it.
One more practical note: cell service can be spotty in parts of the Parks. Download maps, take a few photos of your settings, and don’t plan on constant signal for logistics.
Guides and the photo advantage: how this tour helps you get the shot
A big theme on these tours is guide style. Names that pop up in this operator’s tours include Edward, William, Eddie, Tony, Curtis, and Chris. Across the board, the consistent value is that the guide doesn’t just narrate from the van.
They’re involved at the stops—helping people walk safely, managing timing, and making sure you get photo opportunities. Some guides are especially helpful with taking pictures or videos using your phone, which is huge if you’re traveling solo or as a couple and you don’t want to rely on strangers.
Also, guides often bring a sense of humor and keep the energy up. On a 10-hour winter day, that matters more than you think.
Weather changes: what to expect when winter refuses to cooperate
Winter routes can shift. Your itinerary can be adjusted the day before due to unpredictable weather and road conditions, and your guide will work around what’s accessible that day.
That means you should keep expectations flexible. If one viewpoint is compromised, you’ll likely get swapped stops or alternative photo areas rather than a wasted day. The good news is the tour is built with multiple lake-and-falls points, so it has enough redundancy to keep the day interesting.
A smart move: check your email and messages the day before. The reminder message helps you confirm timing and any changes.
Should you book this Abraham Ice Bubble and Lakes tour?
I’d book it if you want a single-day winter hit of multiple icons—Abraham Lake ice bubbles (seasonal), Peyto Lake, Bow Lake, Athabasca Falls, plus Jasper-area stops—without driving yourself on icy roads. It’s especially good value when you factor in included traction gear, snowshoe time, and warm drinks, all wrapped into a small group that makes photo stops feel less chaotic.
I’d hesitate if you hate long drives or you want a very slow, unstructured day. This tour is built for momentum. Also, because you need to bring your own lunch and the stops don’t have meals, you’ll feel the difference if you’re not prepared.
If you’re comfortable dressing for winter and you like the idea of a guided loop through Banff and Jasper highlights, this is one of the easiest ways to make those frozen-lake dreams real.
FAQ
When will I visit Abraham Lake versus Sunwapta Falls?
Abraham Lake is visited 12/1–3/31. Sunwapta Falls is visited 10/14–11/30 and 4/1–5/31.
How long is the tour?
The tour runs for 10 hours, including travel time.
Where are the pickup and drop-off locations?
Pickup and drop-off are offered at fixed locations: Calgary (Delta Hotels by Marriott Calgary Downtown), Canmore (Travel Alberta Canmore Visitor Information Centre), Banff (Banff Caribou Lodge & Spa), and Lake Louise (Lake Louise Visitor Centre).
What time does pickup start from Calgary, Canmore, Banff, and Lake Louise?
Fixed pickup times are listed as 07:15 Calgary, 08:40 Canmore, 09:00 Banff, and 09:50 Lake Louise.
What winter activities and gear are included?
The tour includes complimentary snowshoe equipment and free crampons rental.
Are hot drinks or snacks provided?
You get complimentary hot coffee or tea. Some days may also include additional refreshments such as water and snacks, depending on the guide and conditions.
Do I need to bring lunch?
Yes. Meals aren’t included, and there are no restaurants or fast food options at the attraction stops, so you should bring your own lunch.
What should I bring for the winter conditions?
Bring comfortable shoes, a jacket, gloves, a hat, and a camera. Also plan for food and drinks since lunch isn’t provided.
Are there any restrictions on what I can bring?
Weapons or sharp objects are not allowed. Smoking in the vehicle, alcohol, and drugs are not allowed.
What is the cancellation policy and can I pay later?
You can cancel up to 24 hours in advance for a full refund. You can also reserve now & pay later (keep your travel plans flexible).