REVIEW · BANFF NATIONAL PARK
Columbia Icefield: Guided Glacier Hike
Book on GetYourGuide →Operated by Icewalks · Bookable on GetYourGuide
Step onto living ice in Alberta. The Athabasca Glacier hike feels special because you peer into deep crevasses under ACMG-certified guidance and you get the practical satisfaction of walking on glacier ice with provided traction gear. I also like that the guide keeps the pace human and the explanations clear, not fluffy. One real consideration: the tour runs at about 2,000m, so some people feel short of breath on the climb.
This is the kind of glacier walk where your guide matters. In multiple trips, guides like Pete (funny and informative), Troy (explained the science clearly), and Corin (extra care on slippery sections) are a big reason people leave smiling. You’ll do a short shuttle, strap on micro-spikes, and follow a route designed for safety around crevasses—plus a program that points out what you’re actually seeing as the ice changes.
In This Review
- Key things I’d highlight before you book
- Walking onto the Athabasca Glacier: the 5 km route that actually makes sense
- ACMG-certified guides and how they keep the hike safe around crevasses
- Included gear that makes the difference: micro-spikes, boots, rainwear, poles
- What you’ll see: crevasses, mill wells, meltwater streams, and icefalls
- Difficulty and altitude: moderate hike, but not for everyone
- Price and value: is $96 a fair deal?
- Getting there: where to meet the Icewalks vans on HWY 93
- Who should book this glacier hike?
- Should you book the Columbia Icefield Guided Glacier Hike?
- FAQ
- How long is the Columbia Icefield guided glacier hike?
- How far do you walk, and how much elevation gain is there?
- What gear is included with the tour?
- Do I need to have technical climbing skills?
- Where do I meet the tour?
- Is the tour in English?
- What should I bring?
- Is it refundable if I cancel?
Key things I’d highlight before you book
- Crevasse viewing with real safety rules: You get to see the dramatic meltwater pours without taking silly risks.
- Micro-spikes + full loaner kit: Traction, rain gear, poles, gloves, and even boots are part of the deal.
- 5 km roundtrip with a manageable climb: About 200m gain on a moderate route to get you onto the ice.
- Ice formations you can name: Mill wells, meltwater streams, and icefalls are explained from a safe distance.
- Iconic Rockies viewpoints as a bonus: You’re up on glacier terrain with the highest-peak scenery in view.
- Small-group guiding style: The guide leads, corrects, and checks on comfort throughout the walk.
Walking onto the Athabasca Glacier: the 5 km route that actually makes sense
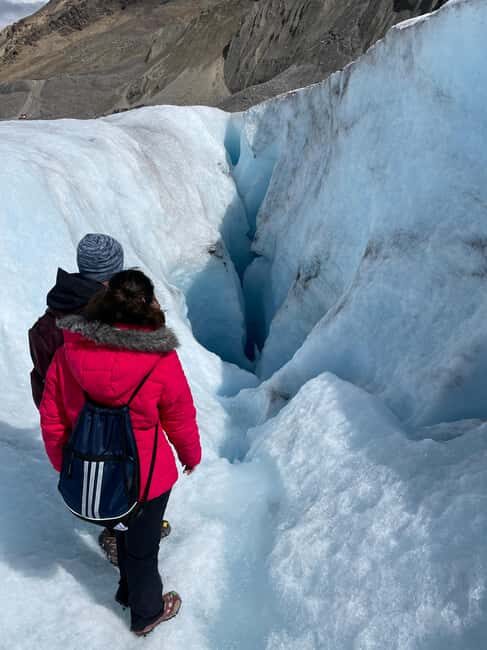
The core of this tour is a guided, moderate hike onto the Athabasca Glacier, which is a key part of the wider Columbia Icefield. Expect a total roundtrip walk of about 5 km, with roughly 200m of elevation gain. That sounds straightforward, but glacier ground has its own rhythm. Your steps need to be deliberate, and you’ll likely slow down on uneven ice and small rises.
From the meeting point, you get a short shuttle to the trailhead, then the tour begins in earnest. You walk onto the glacier and spend time on foot taking in ice features up close. The route is designed so the guide can manage group spacing near risk areas (especially crevasses) and still keep the experience feeling like a walk, not a lecture.
Timing-wise, this is a 3-hour outing. Tours usually run morning and afternoon, so you can pair it with other Icefield stops in a way that feels efficient rather than exhausting. If you like being outside, moving, and learning at the same time, this format tends to work well because you’re not just “looking from afar.” You’re actually there on the ice.
You can also read our reviews of more tours and experiences in Banff National Park.
ACMG-certified guides and how they keep the hike safe around crevasses
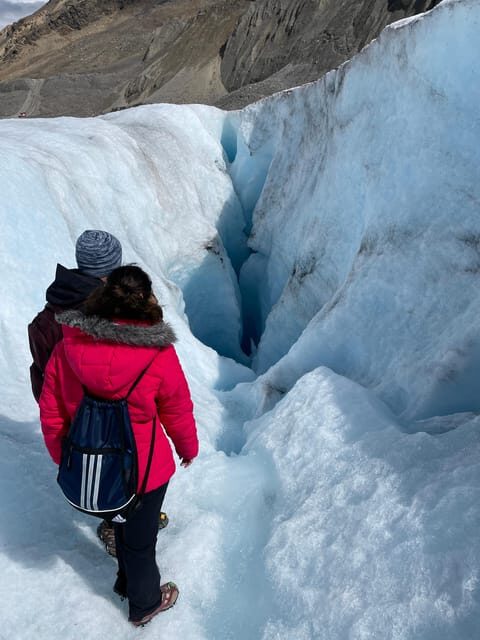
Safety here isn’t a poster on the wall. It’s built into how the guide runs the glacier time. You’ll be led by an ACMG-certified guide, and that certification matters because glaciers are not uniform. Ice can be stable in one spot and unpredictable only a few steps away.
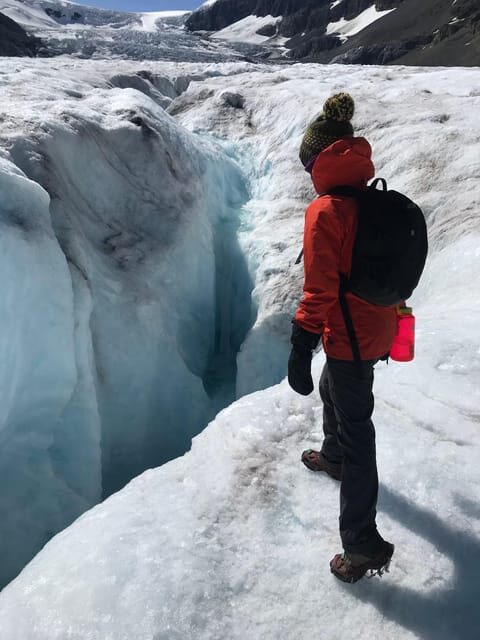
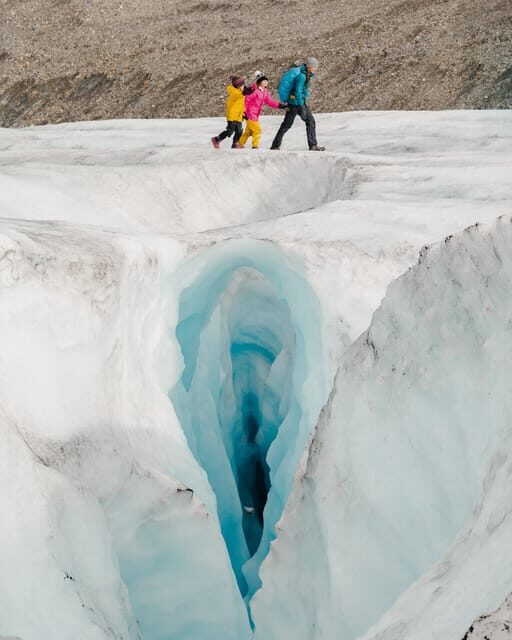
You’ll be moving with the guide’s instructions on where to step, when to slow down, and how to get a good look without crowding danger. The highlight people remember is the chance to peer into deep crevasses and watch meltwater pouring over edges. That’s a dramatic moment—also a reason the guide takes crevasse safety seriously.
On the ice, you’ll see more than one type of feature. You might stop to look at mill wells (water disappearing into the ice), meltwater streams (the channels carrying runoff), and icefalls from a safe vantage. The key point is that you’re learning the glacier’s behavior in real time, while the guide keeps you positioned where it’s safe to watch.
This also helps with confidence. When someone like Pete keeps the group engaged while giving clear safety guidance—or Troy explains the science in a way you can actually follow—you’re not guessing. You know why you’re stopping, what you’re looking at, and what not to do.
Included gear that makes the difference: micro-spikes, boots, rainwear, poles
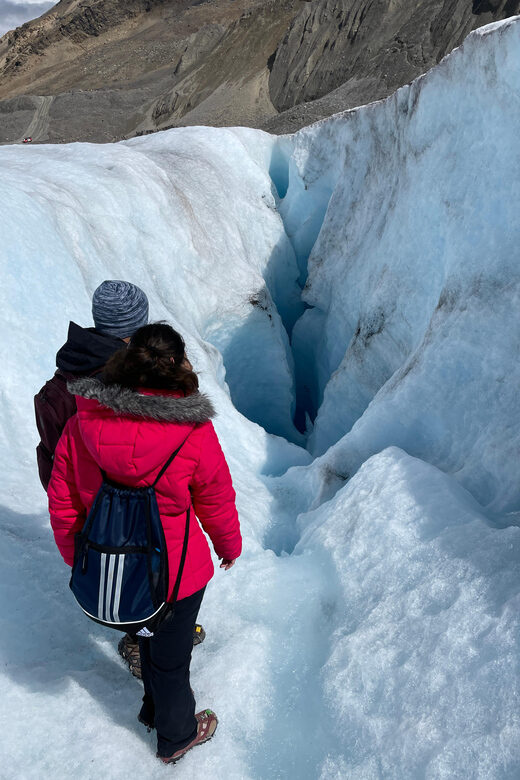
One of the best parts of this tour is that you’re not left to figure out glacier basics. The price includes equipment meant for traction and comfort on ice.
Included gear:
- Micro-spikes (crampons for extra grip)
- Rain gear
- Hiking poles
- Gloves and hats if you need them
- Hiking boots (loaner boots provided)
- Transport from the meeting location to the trailhead
- A guide
Why this matters: micro-spikes aren’t optional “nice-to-have” gear. They change how confident you feel on icy, sloped, or uneven glacier surfaces. Also, the guide can make sure everyone has the right fit and understands how to walk with traction gear on—not just toss it at you and wish you luck.
The tour includes rain gear, which is important because glacier weather can be changeable. Even on a clear day, conditions can turn cold quickly once you’re out on the ice. Still, warm layers are not included. You’ll want to plan for cold hands and chilly legs even if it feels mild before you start.
My practical advice: if you’re deciding what to bring, treat this as a cold-weather outing, not a “summer hike.” Pack thermal clothing and dress in layers that you can adjust.
What you’ll see: crevasses, mill wells, meltwater streams, and icefalls
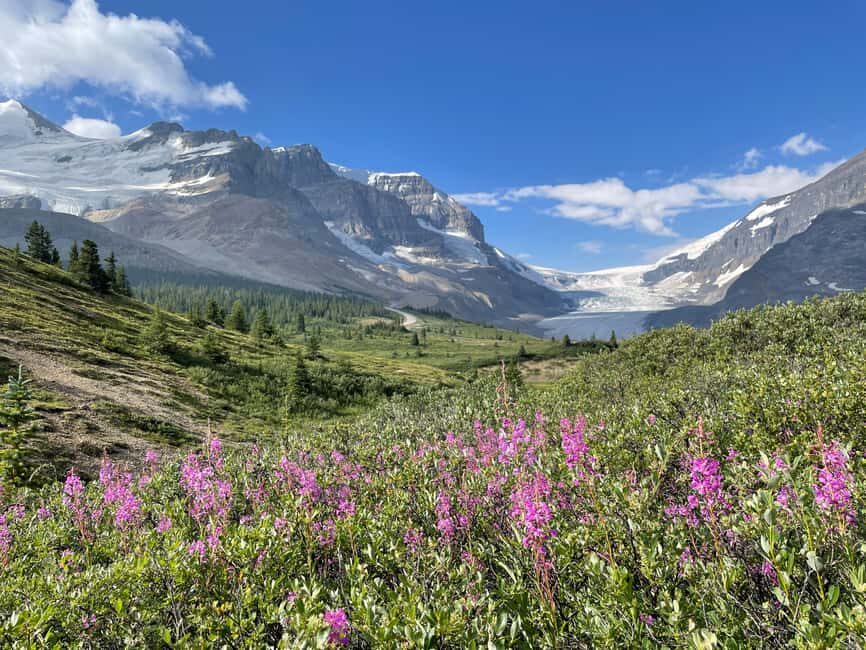
The Athabasca Glacier isn’t just “big ice.” It’s an active system. That’s why the interpretive program works so well: it helps you connect the visuals to the glacier’s processes.
Here are the main feature types you should expect to see:
- Crevasses: deep cracks in the ice. You’ll get a chance to peer into them safely and see meltwater moving over edges.
- Mill wells: water channels that plunge into the ice, showing you how runoff can disappear below the surface.
- Meltwater streams: small rivers of meltwater carving through or running across ice.
- Icefalls: visible from a safe distance, as a dramatic reminder that glaciers move and fracture.
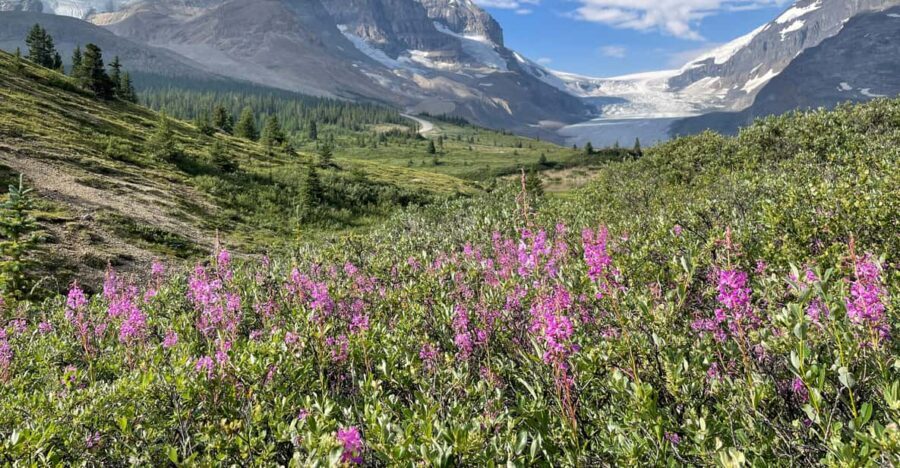
You’ll also get iconic views of the Rockies’ highest peaks while you’re walking. This is one of those tours where the scenery is real, not a backdrop you barely notice between stops. Even when the ice is the star, the mountain views keep pulling your attention upward.
A small but meaningful detail: in practice, guides often give time for individuals to see features. Corin, for example, is described as taking extra care on hills and giving each person ample opportunity to see what’s happening. That’s a big deal when you’re standing on cold ice with a limited window of calm weather. You don’t want a constant rush where everyone barely glances at the interesting stuff.
Difficulty and altitude: moderate hike, but not for everyone
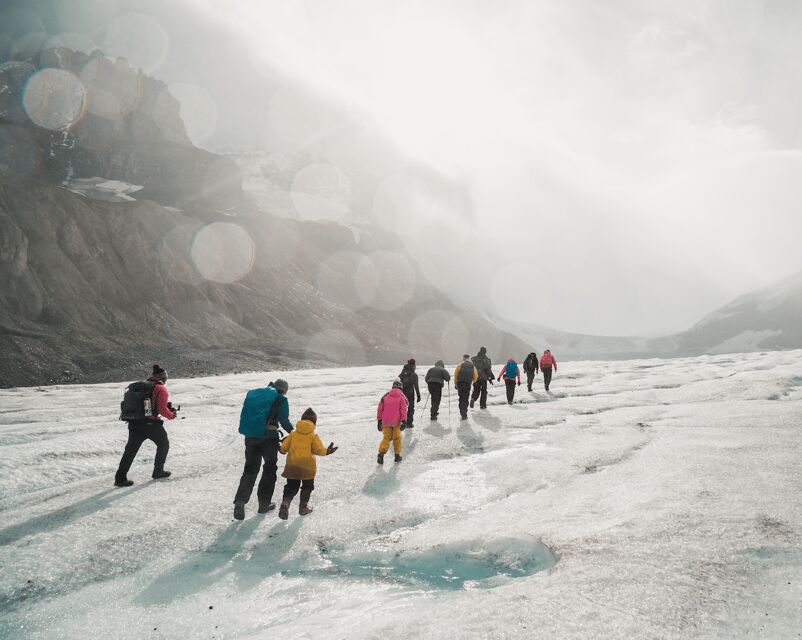
This is rated moderate difficulty, and it’s suitable for young children ages 7–16 who enjoy hiking and for active seniors who are comfortable on uneven ground. But the tour has clear limits, and you should respect them.
The big “know before you go” issue is the altitude. The activity operates around 2,000m, and some people experience shortness of breath due to elevation. That can happen even if you’re a fit walker. The fix is simple: move steadily, take breaks when the guide calls for them, and don’t try to power through.
It’s also not suitable for:
- Children under 7
- People with mobility impairments
- Wheelchair users
- People with heart problems
- People with pre-existing medical conditions
- People with low level of fitness
- People over 75
- People with a cold (this one is explicitly listed)
If any of those apply to you or your group, skip this hike and choose a different glacier experience that fits your needs better.
Also, there’s no technical climbing involved. You don’t need climbing experience. But you do need comfort walking on ice with traction gear and following instructions.
If you’re unsure whether you fall in the safe category, treat this as a serious outdoor day. Ask yourself: can I hike for 5 km on uneven terrain and adjust to cold, altitude, and traction gear? If yes, you’re likely a good fit.
Price and value: is $96 a fair deal?
At $96 per person for about 3 hours, this tour isn’t “cheap,” but it’s also not overpriced for what you’re buying. You’re paying for a guided glacier walk where safety and instruction are built in, not tacked on.
Here’s what helps the value hold up:
- The guide is included, and the guide is ACMG-certified.
- Gear is included: micro-spikes, rain gear, boots, poles, gloves, and hats if needed.
- You get a short shuttle to the trailhead.
- The time on glacier ice is hands-on: roughly 5 km roundtrip with stops tied to glacier features.
Compare that to glacier sightseeing that stays at a distance. This experience has a different payoff: you walk onto the ice, you see meltwater action up close, and you learn the “how” behind the “wow.”
The main cost risk is what you bring (or don’t bring). Warm layers are not included, and you don’t want to be cold and miserable just because the gear list looks generous. Plan for thermal clothing and consider a good snack strategy, since you’ll want energy for the hike.
Getting there: where to meet the Icewalks vans on HWY 93
Meeting point matters here because you’ll be starting right at the edge of the Icefield area.
From HWY 93, turn into the Icefield Information Centre and Glacier Gallery parking lot. Look for a black trailer and white vans with the IceWalks logo at the T-junction between the overflow RV parking and visitor parking. The parking lot is on the north side of the highway, opposite the glacier.
A couple of practical reminders:
- Do not go into the building.
- Do not park in the Glacier View Hotel Parking lot.
If you’re driving yourself, give yourself extra time so you’re not arriving flustered. In glacier country, being rushed is the fastest way to forget a layer or misplace your group.
Who should book this glacier hike?
Book it if you want a guided glacier experience that’s active, educational, and safety-led. This tour fits especially well if:
- You like hiking but want it guided and structured.
- You want to actually step onto the Athabasca Glacier, not just photograph it.
- You want to learn glacier features like crevasses, mill wells, meltwater streams, and icefalls from the people who teach this terrain for a living.
- Your group includes people who appreciate a sense of humor and good explanations. Past guide styles like Pete’s fun delivery and Troy’s clear science teaching are the kind of energy that makes the cold feel less sharp.
Skip it if:
- Altitude and health limits apply to you.
- You’re looking for a fully flat, low-effort outing.
- You’re traveling with someone who can’t handle cold, traction gear, or uneven glacier ground.
Should you book the Columbia Icefield Guided Glacier Hike?
Yes, if you’re the type who wants the glacier to feel real under your boots. The mix of ACMG safety, provided traction gear, and ice-feature interpretation is a strong value at $96, especially because you get to see things most people only ever view from a distance.
My decision checklist for you is simple:
- Pack thermal clothing and plan for cold.
- Be honest about fitness and altitude comfort.
- If you can handle a 5 km moderate walk at elevation, you’ll get a lot out of the 3-hour format.
If you match those boxes, this is one of the more worthwhile ways to experience the Columbia Icefield—because you don’t just look at the glacier. You walk with it.
FAQ
How long is the Columbia Icefield guided glacier hike?
The tour lasts about 3 hours.
How far do you walk, and how much elevation gain is there?
It’s a 5 km roundtrip walk with about 200m of elevation gain.
What gear is included with the tour?
You get a guide, micro-spikes, rain gear, hiking poles, hiking boots, gloves, and hats if you don’t have your own.
Do I need to have technical climbing skills?
No technical climbing experience is required.
Where do I meet the tour?
Meet at the Icefield Information Centre and Glacier Gallery parking lot. From HWY 93, turn in and look for the black trailer and white IceWalks vans at the T-junction between overflow RV parking and visitor parking.
Is the tour in English?
Yes, the live tour guide speaks English.
What should I bring?
Bring snacks and thermal clothing.
Is it refundable if I cancel?
Yes. Free cancellation is available up to 24 hours in advance for a full refund.