REVIEW · VANCOUVER
Vancouver Lookout Admission Ticket
Book on Viator →Operated by Vancouver Lookout · Bookable on Viator
Two minutes up, and Vancouver changes. The Vancouver Lookout at Harbour Centre is a fast, clear way to get 360° views plus on-deck education that helps you place Gastown, Coal Harbour, Stanley Park, and the surrounding mountains, including the North Shore. I also like how the self-guided audio tour and information panels work together so the view is more than just pretty. One thing to consider: some angles can be less dramatic because of nearby newer buildings, so you’ll want to walk the deck and pick the best viewpoints.
Plan on about 30 to 45 minutes, and you can take your time once you’re up there. The elevator runs from Harbour Centre near Waterfront Station, and your mobile ticket gets you in during open hours.
In This Review
- Key points before you go
- Vancouver Lookout at Harbour Centre: What You’re Really Buying
- Getting There and Entering With Your Mobile Ticket
- The Glass Elevator Ride Up: Fast, Smooth, and Very Real
- Stop 1: The Vancouver Lookout Deck and 360° Viewing Strategy
- Exhibits and the Self-Guided Audio Tour That Actually Helps
- How Much Time You Need (and the Last-Elevator Rule)
- Price and Value: Is $16.96 Worth It?
- Common Friction Points to Know Before You Go
- Who Should Book This Vancouver Lookout Ticket?
- Quick practical tips before you go
- Should You Book the Vancouver Lookout Ticket?
- FAQ
- Where is the Vancouver Lookout, and how do I get in?
- How long should I plan to spend there?
- What views can I expect from the top?
- Is the audio tour included with admission?
- Is there a time limit once I’m on the viewing deck?
- What time do I need to be there by?
- Can I get a refund if I change my plans?
Key points before you go
- Harbour Centre location near Waterfront Station makes it an easy add-on to a downtown day
- 168 meters (553 feet) glass elevator to a high, true 360° view of the city
- 360° photos and orientation: Stanley Park, Gastown, Coal Harbour, North Shore, and more
- Self-guided audio + information panels so you understand what you’re looking at
- Free Wi‑Fi is available, plus staff are typically helpful at both levels
- No time limit once you’re on the deck, but the last elevator leaves 30 minutes before closing
Vancouver Lookout at Harbour Centre: What You’re Really Buying
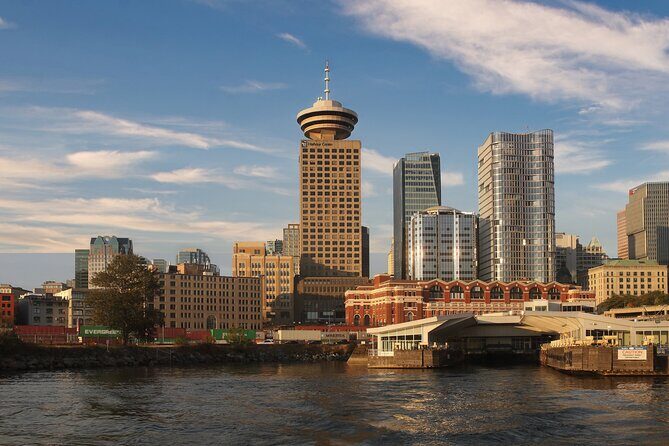
You’re not buying a guided walking tour. You’re buying a view with context, delivered fast. The Vancouver Lookout sits on top of Harbour Centre in downtown, and that matters because you can see a lot of Vancouver without spending hours getting there and back.
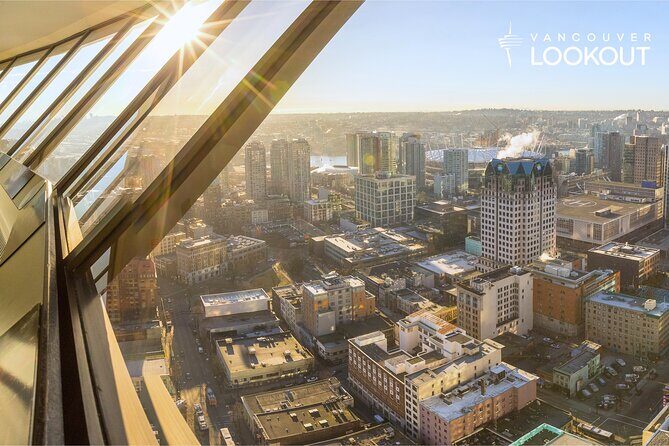
What I like most is the combination of height and clarity: you rise to about 169 meters (553 feet) and can scan across the water, the downtown core, and the mountain backdrops. The second big plus is that the deck isn’t just a railing and a postcard view. You get educational exhibits and either signage or a self-guided audio tour, which helps you understand what you’re seeing instead of guessing from a distance.
The main tradeoff is also simple: it’s a lookout. You will notice that not every direction looks equally wide or dramatic, especially when taller buildings are in the way. So bring a little patience and a willingness to move around for the best angles.
A few more Vancouver tours and experiences worth a look

Getting There and Entering With Your Mobile Ticket
The Vancouver Lookout is housed at Harbour Centre, near Waterfront Station, so you’re in the core of things. That’s useful if you want to pair it with other downtown stops like a harbor walk, a meal, or an easy transit day.
Your ticket is a mobile ticket, and admission is set up for one-time access to the observation deck. You’ll show your pre-purchased ticket at the start point and then head up via the high-speed elevator.
Two practical tips that can save time:
- Go in with enough buffer to be at the elevator area early. The last elevator to the observation deck leaves 30 minutes before closing time.
- If you plan to use the audio tour, have your phone ready and do a quick test when you arrive. Some visitors report audio/connectivity glitches even though free Wi‑Fi is offered.
The Glass Elevator Ride Up: Fast, Smooth, and Very Real
The signature move is the ride itself. You’ll take the glass elevator to the viewing deck, rising roughly 168 meters (553 feet). The elevator is fast, and the glass gives you that immediate sense of height without needing any hiking or stairs.
Is it scary? For some people, the glass effect is enough to make them second-guess their life choices. For others, it’s just fun. Either way, it’s worth noting that the elevator is a core part of the experience—many people end up remembering the ride as much as the view.
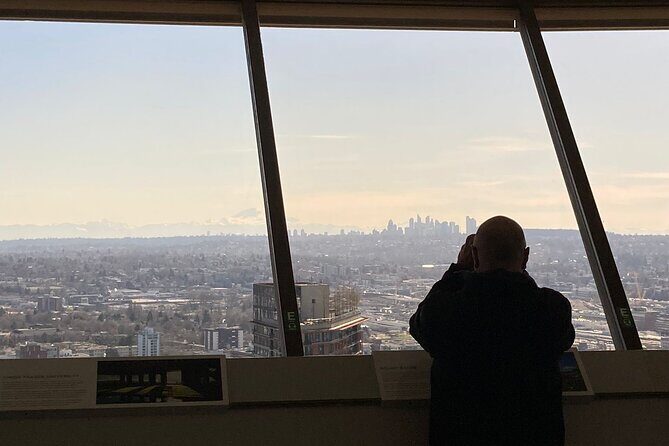
When you get to the top, you’re not trapped in a single line. The terrace is organized, and if it’s not crowded you can walk the deck at your own pace and re-find viewpoints you like.
Stop 1: The Vancouver Lookout Deck and 360° Viewing Strategy
This is the whole “tour” in a nutshell, and it’s the best use of your time if you treat it like a viewpoint mission.
Once you’re on the deck, you’ll have a 360° view that stretches across:
- Stanley Park
- Historic Gastown
- Coal Harbour
- The North Shore and surrounding mountain areas
- The Pacific Ocean and waterfront directions
- The broader downtown core and skyline
Here’s how to get the most out of it, even if you’re short on time:
- Start with the orientation scan. Don’t stop at the first window. Walk slowly to find the skyline direction you recognize from street level.
- Then switch to landmarks. Pick 2 to 3 anchor spots (like Stanley Park and Gastown). Once you know them, everything else becomes easier to place.
- Finish with the mountains and water. Even on partly cloudy days, the mountain silhouettes and the harbor lines can be surprisingly readable from this height.
Photography note: the deck is meant for looking outward, but you’re also going to be behind glass at times. Some visitors have mentioned issues like windows looking dirty, so if photos are a priority, change angles and move along the deck to find cleaner sections or lower-glare spots.
Exhibits and the Self-Guided Audio Tour That Actually Helps
The deck includes information panels and educational exhibits about Vancouver’s past, present, and future. That’s the difference between a lookout that’s just entertainment and one that helps you “get” the city faster.
You also get a complimentary self-guided audio tour. The audio experience is designed to make the view make sense as you move window to window (or stop near a specific sight line). Even when it’s working perfectly, it can do a lot for first-timers: it gives you names, context, and quick explanations instead of making you rely on guesswork.
A couple of practical realities from the experience:
- Some people report the audio guide connected to their phone but kept stopping and starting, so they skipped it and relied on reading along.
- Others mention confusion around Wi‑Fi availability even though the venue offers it.
My advice: don’t treat the audio tour like your only option. Use it if it’s smooth, but count on the signage panels too. That way, a phone hiccup doesn’t ruin your time.
Also, if you’re sensitive to noise or you don’t want to listen at full volume in a shared space, consider bringing headphones or Bluetooth earbuds. That’s not required, but it makes the experience easier when lots of people are using their phones at once.





How Much Time You Need (and the Last-Elevator Rule)
The listed visit time is about 30 to 45 minutes. In practice, it helps to think of it as:
- 10 minutes to get oriented
- 20 minutes to enjoy and photograph your must-see points
- 10 minutes to read the exhibit panels and, if it’s working, listen to the audio tour
If you want a more relaxed pace, plan closer to 45 minutes or a bit more. The key is this: once you’re up there, there’s no time limit to stay on the viewing deck.
But don’t ignore the timing detail: the last elevator leaves 30 minutes before closing. That means you can’t always “arrive whenever” and still get the elevator to go up. If you’re visiting late in the day, build in extra cushion.
Open hours are 10:00 AM to 6:00 PM during the months listed, with daily access through that window.
Price and Value: Is $16.96 Worth It?
At $16.96 per person, this is priced like a practical add-on, not a big production. The value comes from two things you can’t easily replicate for the same money:
- A high, centralized viewpoint that covers multiple Vancouver icons in one go
- Context on-site through panels and a self-guided audio tour, so you leave understanding more than you started with
If your day in Vancouver is packed, this kind of ticket works because it compresses a lot of “city viewing” into a short window. You can get your bearings fast from above, then use what you learned to explore on foot afterward.
If you already love looking at cities from above and you’re chasing the tallest thrill possible, you might find other lookouts more dramatic. And if the weather is gray or rainy, the view can be less crisp than your ideal memory. But when the visibility is decent, the deck is an efficient way to see the city’s layout, especially the waterfront and the mountain line behind it.
Bottom line: for most people, the cost-to-time ratio feels fair because you’re not paying for a guided group schedule. You’re paying for the deck time and the viewpoint.
Common Friction Points to Know Before You Go
This isn’t a perfect experience for everyone, and a good review includes the small stuff.
Here are the issues that show up often enough to take seriously:
- Windows may not look crystal clear up close. Some visitors mention dirty glass. If you care about photos, be willing to reposition and search for the best angles.
- View limitations from nearby buildings. A few directions may feel less open than you expect, because taller newer structures can block certain sight lines. Walking the deck helps.
- Audio tour reliability. Even with included audio and free Wi‑Fi available, some people report connection or playback problems. If your audio starts acting up, switch to the information panels immediately.
- Late arrival can mean no entry. The last elevator rule is real. If you show up near closing, you might be turned away.
- Signage and directions can be slightly inconsistent. People have said the route descriptions aren’t always spot-on, so trust your navigation app and head toward Harbour Centre near Waterfront Station.
None of these are deal-breakers, but they’re the difference between a smooth hour and a slightly annoying one.
Who Should Book This Vancouver Lookout Ticket?
I think this ticket is a great fit for:
- First-time visitors who want an orientation view before exploring on foot
- Couples and small groups who like flexible pacing (you’re not stuck in a group schedule)
- Families who can handle a short elevator ride and want an easy win without a long walk
- Budget-minded travelers who want strong value for a quick, iconic viewpoint
It may be less satisfying if:
- You only care about the single most stunning panoramic angle and hate the idea that some directions are blocked
- You expect a fully guided explanation and prefer a real live guide
- You’re extremely sensitive to glass-elevator height effects and don’t want to feel that glass feeling
Quick practical tips before you go
- Wear shoes you can stand in comfortably. You’ll likely move around and pause frequently.
- If you’re serious about photos, arrive with a plan: one pass for landmarks, one pass for water and mountains.
- Don’t rely on the audio tour working flawlessly. The signage is there for a reason.
Should You Book the Vancouver Lookout Ticket?
Yes—if you want an efficient, classic Vancouver viewpoint with built-in context, this is an easy yes. The deck gives you the big-name sights in a short time, and the included audio and panels make it more than a quick selfie stop.
Book it especially if you’re staying downtown and you want to understand the city layout fast: where Gastown sits, how Coal Harbour relates to the waterfront, and how Stanley Park and the mountains frame the skyline.
The only strong reason to skip is if you’re mainly chasing a super-immersive, guided, multi-stop experience. This is a lookout ticket. Simple, direct, and best when you treat it like a focused hour of sightseeing from one of the city’s most convenient high points.
FAQ
Where is the Vancouver Lookout, and how do I get in?
It’s located at Harbour Centre near Waterfront Station in Vancouver. You’ll show your pre-purchased mobile ticket to enter and then take the elevator up to the observation deck during open hours.
How long should I plan to spend there?
Most visits take about 30 to 45 minutes. You’ll have time to look around on the deck, so if you want more reading and photos, aim closer to the longer end.
What views can I expect from the top?
From the observation deck, you can see 360° views of downtown and the surrounding areas, including Stanley Park, historic Gastown, Coal Harbour, the North Shore mountains, and the Pacific Ocean.
Is the audio tour included with admission?
Yes. The ticket includes a complimentary self-guided audio tour, and there are also educational information panels on the deck. Free Wi‑Fi is available, but some people report audio/connectivity issues, so it’s smart to be ready to use the panels too.
Is there a time limit once I’m on the viewing deck?
No. There’s no time limit to stay on the viewing deck after you get up there.
What time do I need to be there by?
The last elevator to the observation deck leaves 30 minutes before closing time. Try to arrive early enough that you’re not rushing at the end of the day.
Can I get a refund if I change my plans?
Yes. There’s free cancellation if you cancel at least 24 hours in advance for a full refund. If you cancel less than 24 hours before the experience starts, it’s not refunded.